
How to Dip Sugar Cookies in Royal Icing
This post may contain affiliate links. Please read our disclosure policy.

Decorating sugar cookies with royal icing couldn't be easier than with this simple royal icing dipping method. This no-fuss technique yields beautifully iced cookies without piping bags, tips, or other decorating tools. Just dip, gently shake, and let the icing settle into a flawless finish.
This is the method I use for my Sugar Cookie Cut-Outs, my new Brown Sugar Cut-Out Cookies, and lemon sugar cookies for quick, festive holiday baking. With a few tips and the right icing consistency, anyone can achieve bakery-style results.

Why This Method Works
The dipping method is all about ease and smoothness. Instead of outlining and flooding (beautiful but time-consuming), you simply lower the cookie into a bowl of royal icing and lift it out-letting gravity and surface tension do the work.
It's ideal for:
- Batches of cut-outs
- Holiday cookie boxes
- Beginner decorators
- Clean, modern cookie designs
- Quick decorating sessions
And because this icing is made with meringue powder, it's stable, safe, and dries beautifully without the need for raw egg whites.
Jump to:
Ingredients
This simple meringue-powder royal icing comes together with just a few staple ingredients and mixes into the perfect dipping consistency.

- Powdered Sugar: The base of the icing. It dissolves smoothly and creates that classic glossy finish perfect for dipping and flooding.
- Meringue Powder: A safe, reliable substitute for raw egg whites that helps the icing set firm. It adds stability, shine, and a smooth texture without altering the flavor.
- Water: Used to bring the icing to the right consistency. Add gradually-just a teaspoon at a time-to reach a thin, pourable, flood-style icing ideal for dipping.
- Vanilla or Almond Extract (optional): A small splash adds a hint of flavor. Almond extract is traditional in holiday cookie decorating, but vanilla keeps the icing soft and classic.
How to Dip Sugar Cookies in Royal Icing
This method is wonderfully easy, and with the right icing consistency, the cookies practically smooth themselves.
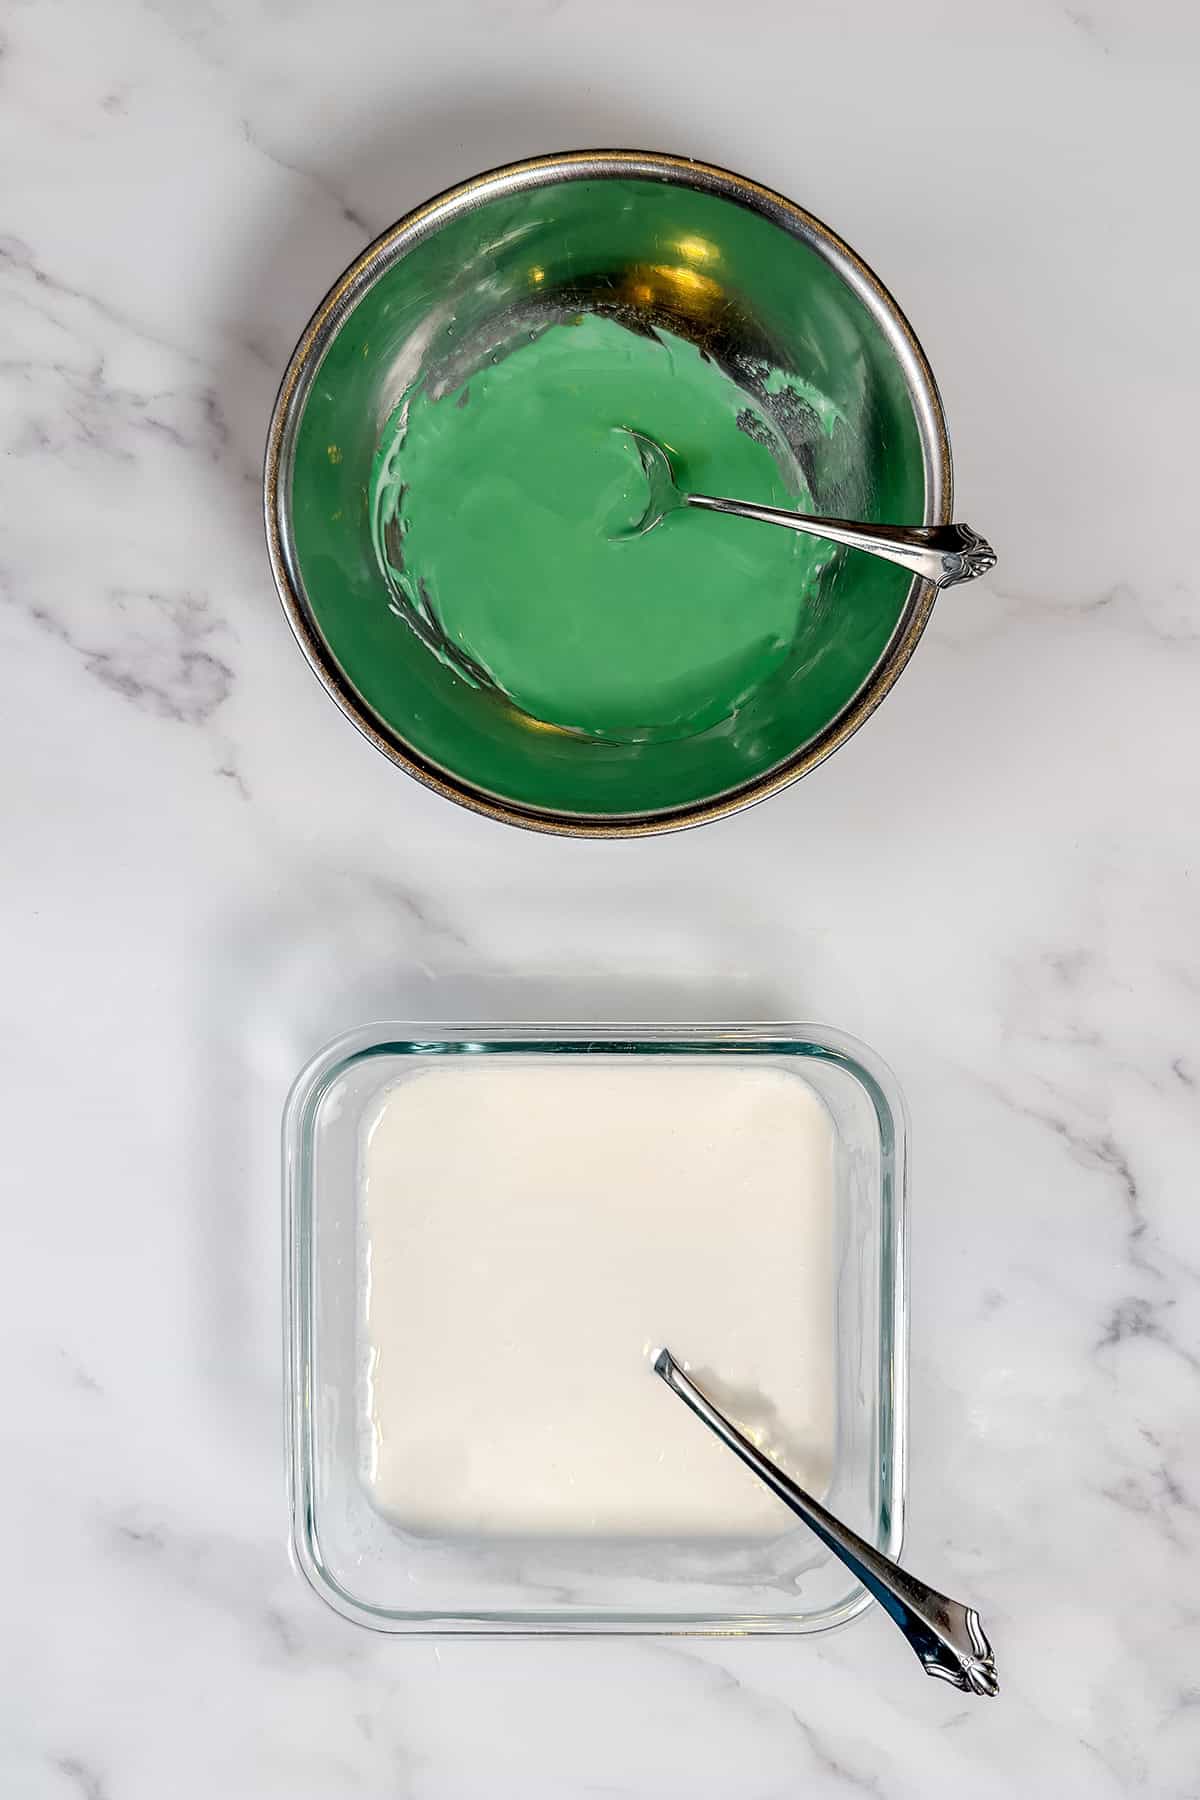
- Step 1: In a large bowl using a handheld or stand mixer fitted with a whisk attachment, mix the confectioners' sugar and meringue powder. Add the water and flavoring, mix on high speed, until the icing drizzles into the bowl and smooths in 5-10 seconds.
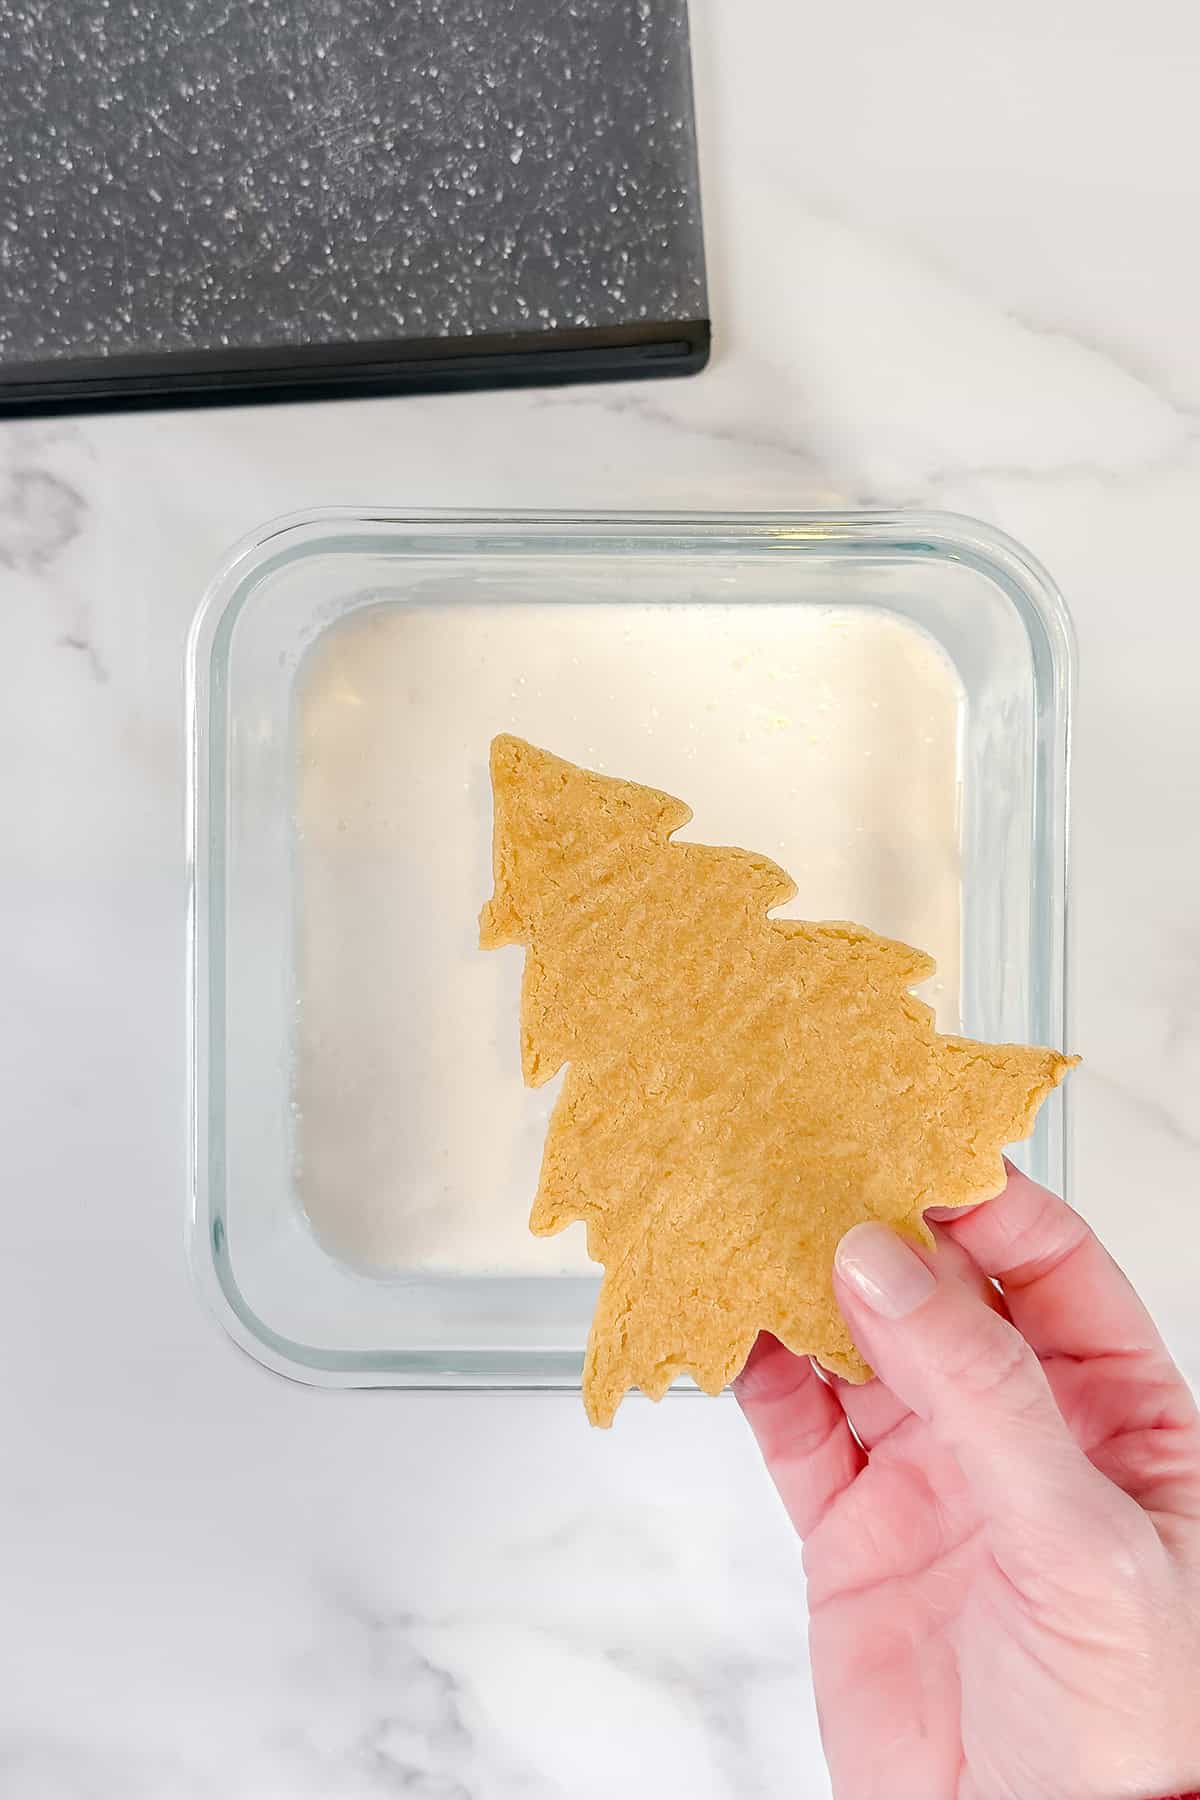
- Step 2: Dip the cookie facedown in the icing by gently holding the edges and dipping only the surface of the cookie. Holding it face down, shake the cookie and let the excess drip back into the icing. Flip upright and place on a surface to dry.
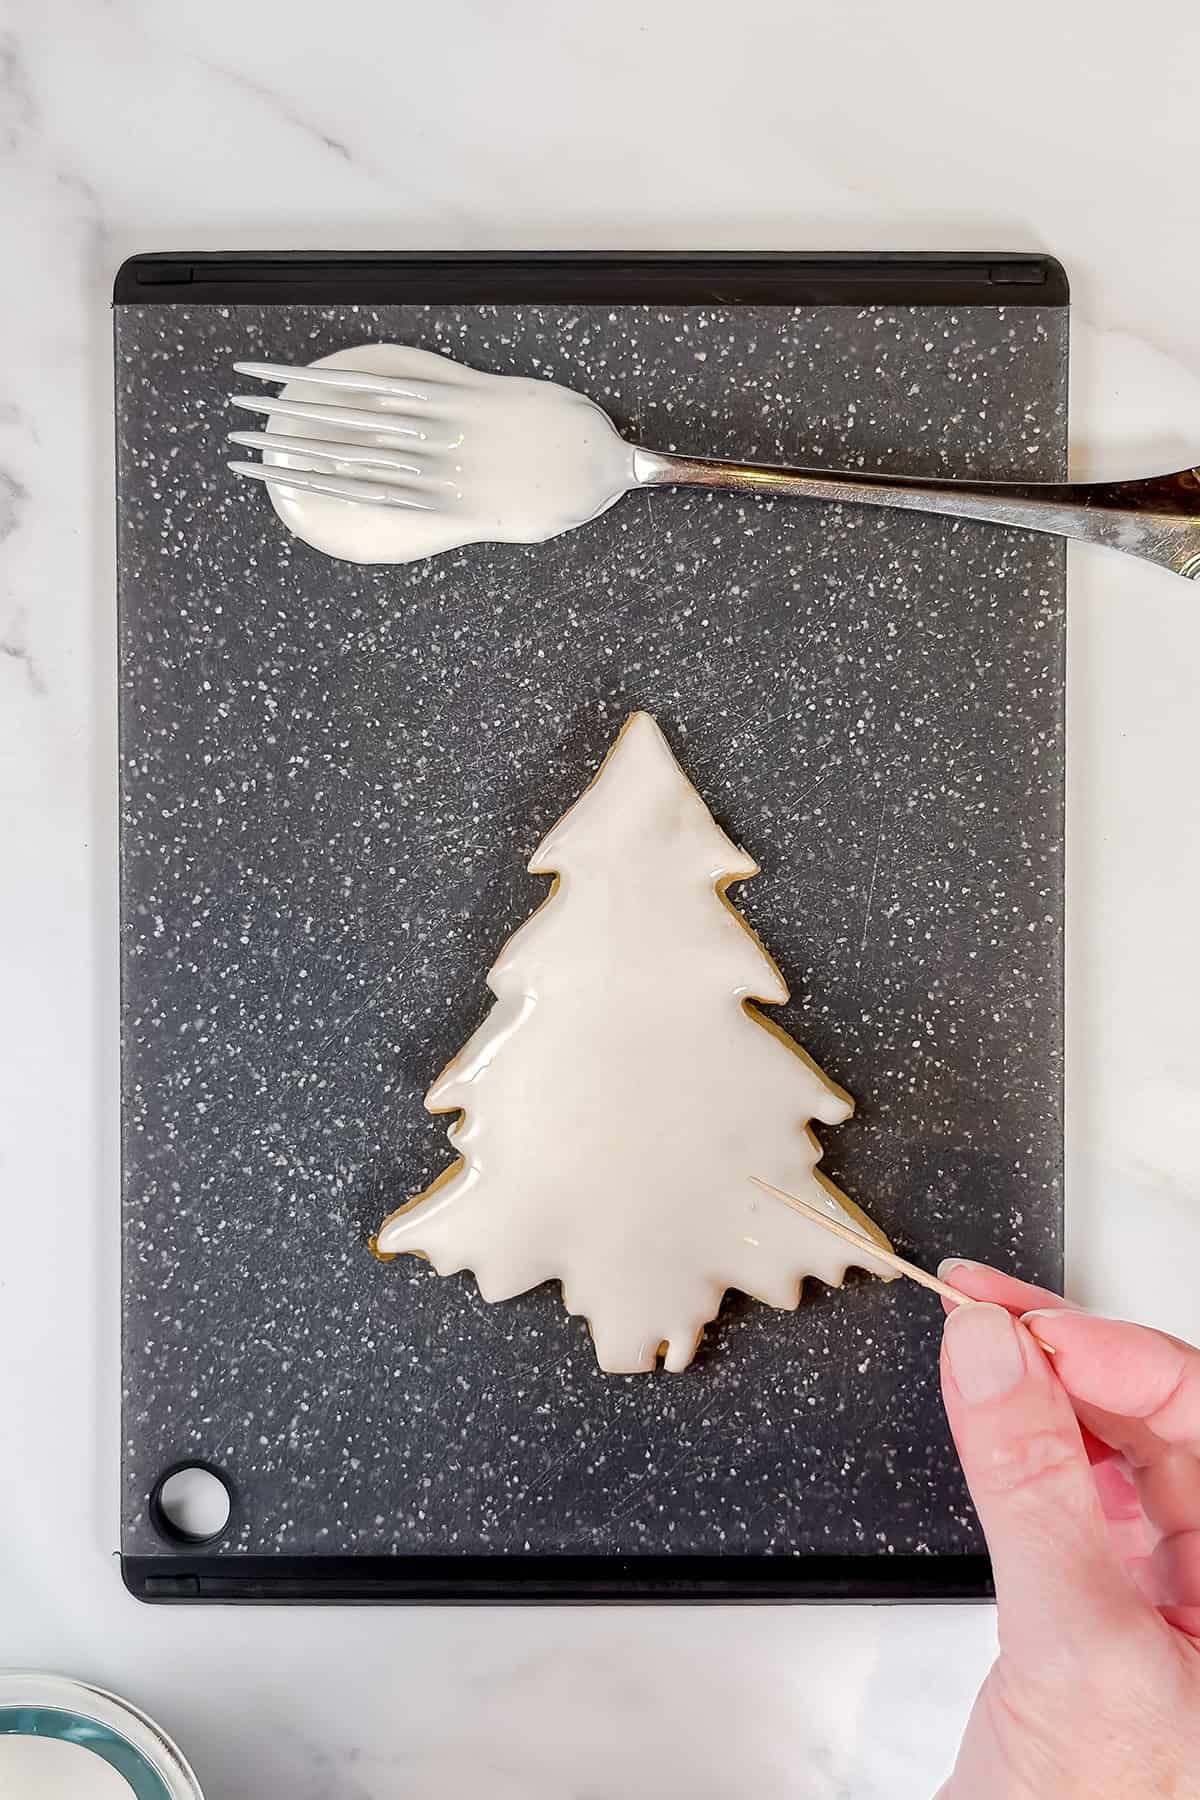
- Step 3: Set the cookie on a surface to dry. Use a toothpick to spread or smooth any air bubbles that arise.

- Step 4: If using a second color, divide the icing into separate bowls and tint with food gel. For a swirled effect, dot the cookie with the second color and swirl with a toothpick, and allow to dry.
Hint: Add sprinkles or decorations within the first 10 minutes, or let dry fully before piping additional details.
The 10-Second Rule
To test royal icing for dipping or flooding, drag a spoon through the surface of the icing. If the line disappears in about 10 seconds, the icing is at the ideal consistency-smooth, pourable, and perfect for creating a flawless finish on cookies.
Watercolor (Marbled) Royal Icing Technique
For a soft, painted look-like the Christmas tree cookies shown above-start with flood-consistency icing: thin enough to settle smoothly but still able to hold clean edges. Dip the cookie in white icing, then immediately add a few thin lines or small dots of a second color (such as green).
While the icing is still wet, gently drag a toothpick or scribe tool through the colors to swirl, blend, and "feather" the design into a watercolor or marbled effect. Each cookie will dry with its own unique pattern, making this technique perfect for festive trees, snowflakes, and organic holiday motifs.
Tips for the Best Dipping Results
- Thin in tiny amounts. A teaspoon of water makes a big difference.
- Use a shallow bowl for easier dipping.
- Stir frequently to prevent crusting on the surface.
- Dry cookies uncovered-no humid rooms, no covers.
- Rotate the tray if icing settles unevenly.
- If icing looks streaky, lightly shake the cookie again immediately after dipping.
Troubleshooting
- Icing is too thick: Add ½-1 teaspoon of water.
- Icing is too thin: Add 1-2 tablespoons powdered sugar.
- Cratering or pits: Icing is too thin or needs a gentler shake.
- Air bubbles: Let icing rest 5 minutes, then stir gently.
- Ridges after drying: Icing was too thick or set too fast-thin slightly.
Coloring & Decorating Variations
- Use gel food coloring for vibrant shades.
- Dip cookies twice for a thicker finish.
- Drag toothpicks through two colors to create marbled, watercolor, or swirled effects.
- Add sanding sugar or edible glitter while the icing is still wet.
- Pipe simple lines or details after icing fully dries.
Royal Icing FAQs
It's safer, more stable, lasts longer, and dries with a beautifully smooth finish. No raw eggs, no worry.
Not for this method! Dipping replaces outlining and flooding.
Yes-vanilla, almond, or lemon extract all work well.
It will take between 3-6 hours to dry, depending on humidity. Overnight gives the most reliable set for packaging.
Yes. Once fully dry, freeze in single layers separated by parchment.
Cutout Cookie Recipes
Looking for other recipes like this? Try these:


If you try this recipe, I'd love to hear your comments and consider giving it a 5-star rating. Explore the recipe index for more easy, delicious ideas, and stay updated by subscribing to our newsletter and following us on Facebook, Pinterest, Instagram, and YouTube!
Want to save this recipe?
Enter your email, and we'll send it to your inbox. Plus, you'll get delicious new recipes from us every Friday!

How to Dip Sugar Cookies in Royal Icing
Equipment
Ingredients
- 4 cups confectioners' sugar sifted plus more as needed
- 3 tablespoons meringue powder not plain egg white powder
- 9 tablespoons room-temperature water plus more as needed
- 1 teaspoon pure vanilla extract or ½ teaspoon lemon, coconut, or peppermint (optional)
- optional for decorating: gel food coloring I love this food coloring kit
Instructions
- In a large bowl using a handheld or stand mixer fitted with a whisk attachment, mix the confectioners' sugar and meringue powder.
- Add the water and an extract (if using), and whip on high speed for 1 to 2 minutes. When lifting the whisk up off the icing, the icing should drizzle down and smooth out within 5-10 seconds. If it's too thick, add more water, 1 tablespoon at a time. I usually use 10-12 tablespoons for a flooding consistency. Remember, that the longer you whip royal icing, the thicker it becomes. If it's too thin, keeping whipping as it will continue to thicken, or add a bit more confectioners' sugar.
- Iced cookies will dry in about 2-3 hours at room temperature.
For Tinting
- Divide the icing into separate bowls, one for each color. Add dots of food gel into the icing with a toothpick (a little goes a long ways). Stir in it and add additional drops to deepen the color if needed.
Nutritional information is only an estimate. The accuracy of the nutritional information for any recipe on this site is not guaranteed.
When time is short or you're not in the mood for a length cookie decorating session, try this easy royal icing dipping method. It couldn't be simplier! I love the easy application and the results!