
How to Carve a Turkey (Step-by-Step)
This post may contain affiliate links. Please read our disclosure policy.
Carving a turkey doesn't have to be intimidating, especially with an easy method and helpful step-by-step images. Whether you're hosting Thanksgiving, Christmas, or any special holiday dinner, this guide walks you through every step - from removing the legs and wings to slicing the breast and thigh meat - so you can present a beautiful platter with confidence.
Post Summary
- Carving a turkey can be easy with step-by-step guidance and the right tools, including a sharp carving knife and a sturdy cutting board.
- Let the turkey rest for 20-30 minutes for tender slices and use long, smooth strokes to preserve skin and achieve clean cuts.
- Follow clear instructions for removing legs, wings, and slicing breast and thigh meat to create a beautiful presentation.
- For buffets, slice thinner and keep the platter tightly packed, while thicker slices work better for sit-down dinners.
- Don't waste the turkey carcass; use it to make flavorful homemade stock and remember to store leftovers safely.
Jump to:
- Post Summary
- Before You Begin: Tools, Setup & Chef Tips
- How to Carve a Turkey: Step-by-Step Instructions
- How to Slice Turkey Breast and Thighs
- How to Carve a Turkey Breast Only
- Carving a Spatchcock Turkey
- How to Carve a Smoked Turkey
- Carving for a Buffet vs. Sit-Down Dinner
- Why It's Best to Carve the Turkey in the Kitchen (Not at the Table)
- How to Arrange the Turkey on a Platter
- What to Do With the Turkey Carcass
- Turkey Storage & Food Safety
- From a Private Chef: Pro Secrets for Perfect Turkey Carving
- Turkey Carving FAQs
- Roast Turkey Recipes
- How to Carve a Turkey (Step-by-Step)
- 💬 Comments
Before You Begin: Tools, Setup & Chef Tips
A few small preparations make all the difference in achieving clean cuts and a beautiful presentation.
Tools You'll Need
- A sharp carving knife (or chef's knife)
- A large, sturdy cutting board with grooves
- Paper towels
- Serving platter
- Optional: kitchen shears
See more kitchen tools in my Amazon Holiday Kitchen shop.
Essential Chef Tips
- Work with the bone, not against it. Turkey joints naturally separate with the right angle and very little resistance.
- Let the turkey rest for 20-30 minutes. Resting keeps the juices inside the meat so every slice is tender and moist.
- Stabilize your cutting board. Place a damp towel underneath to keep it from sliding.
- Use long strokes - never saw. Long, confident strokes preserve the skin and produce beautiful slices.
How to Carve a Turkey: Step-by-Step Instructions
Complete step-by-step instructions are also in the recipe card at the bottom of this post.
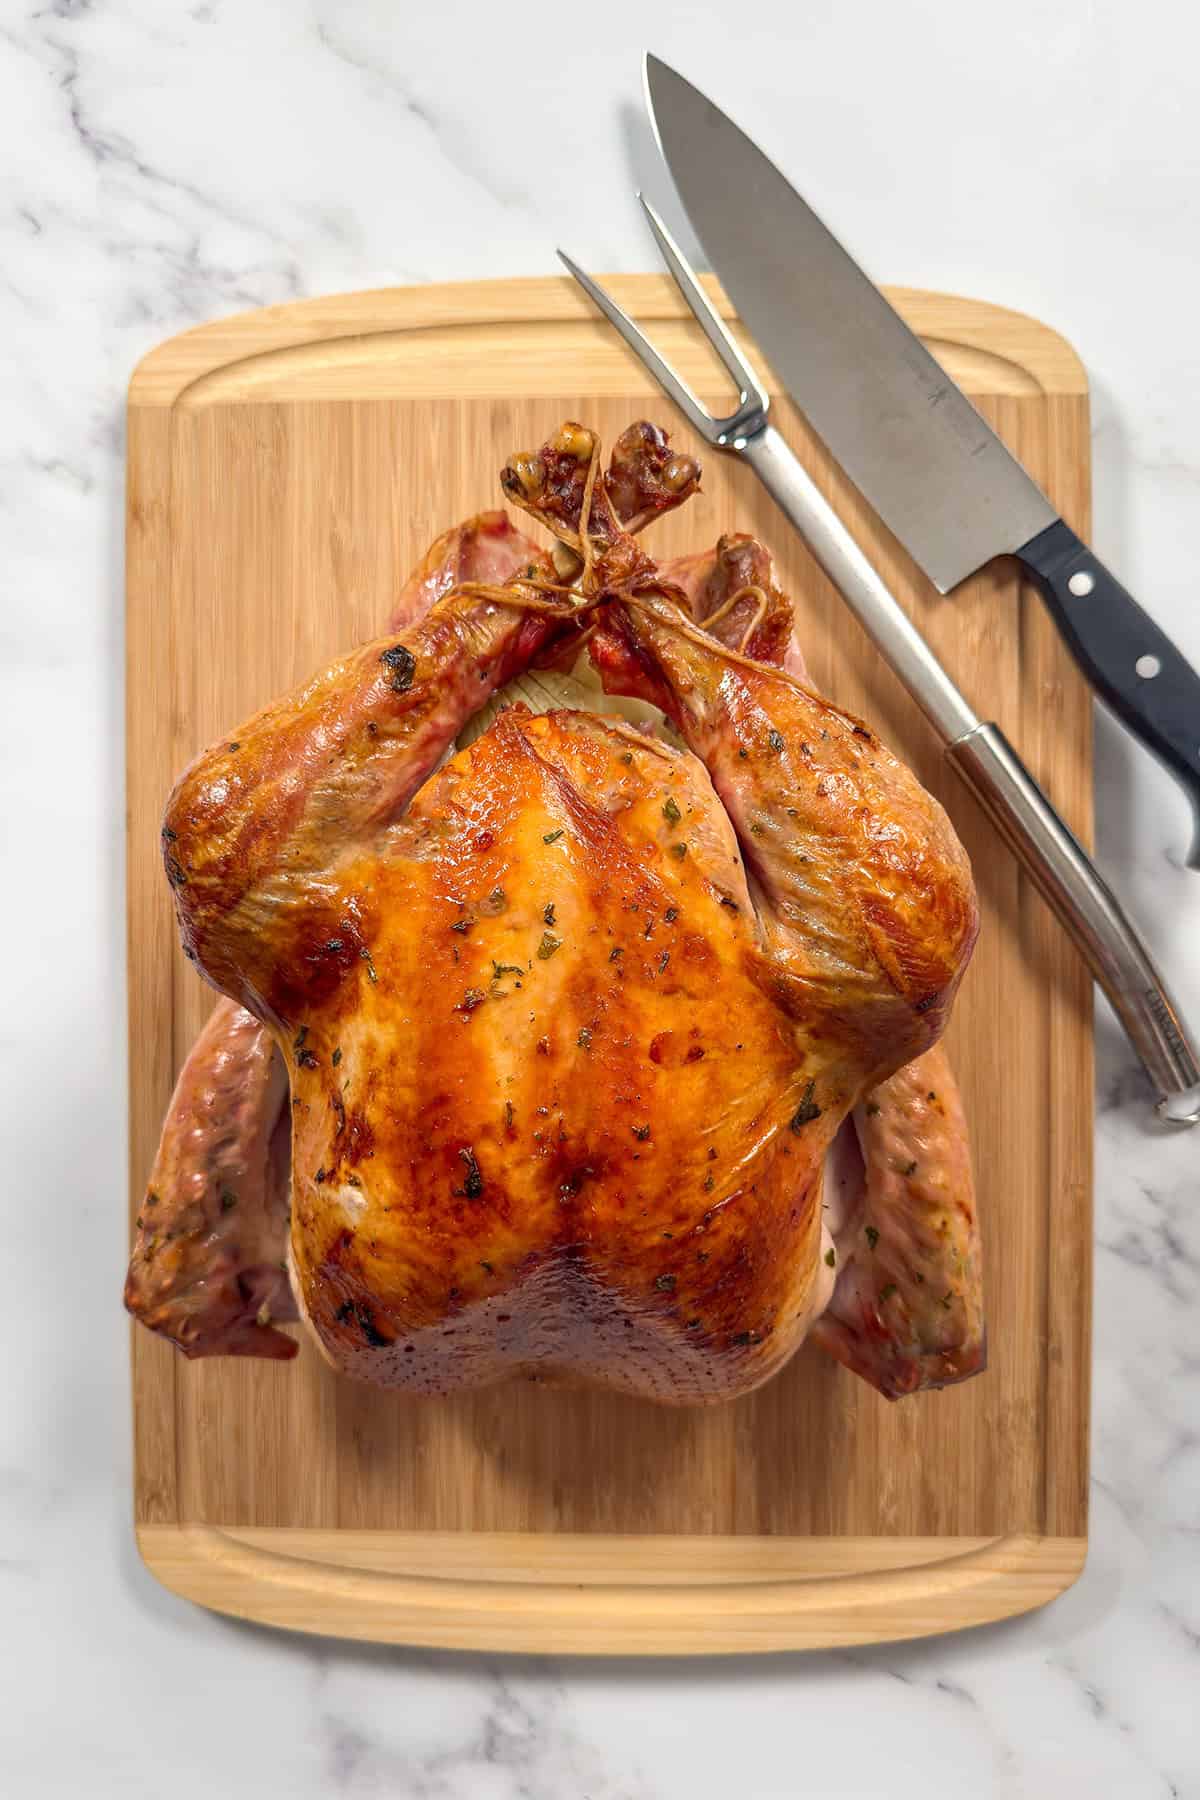
- Preparing the Turkey: Place the roasted turkey breast-side up on a large cutting board. Position the legs closest to you. Gather your tools and remove any butcher's twine if the turkey has been trussed.
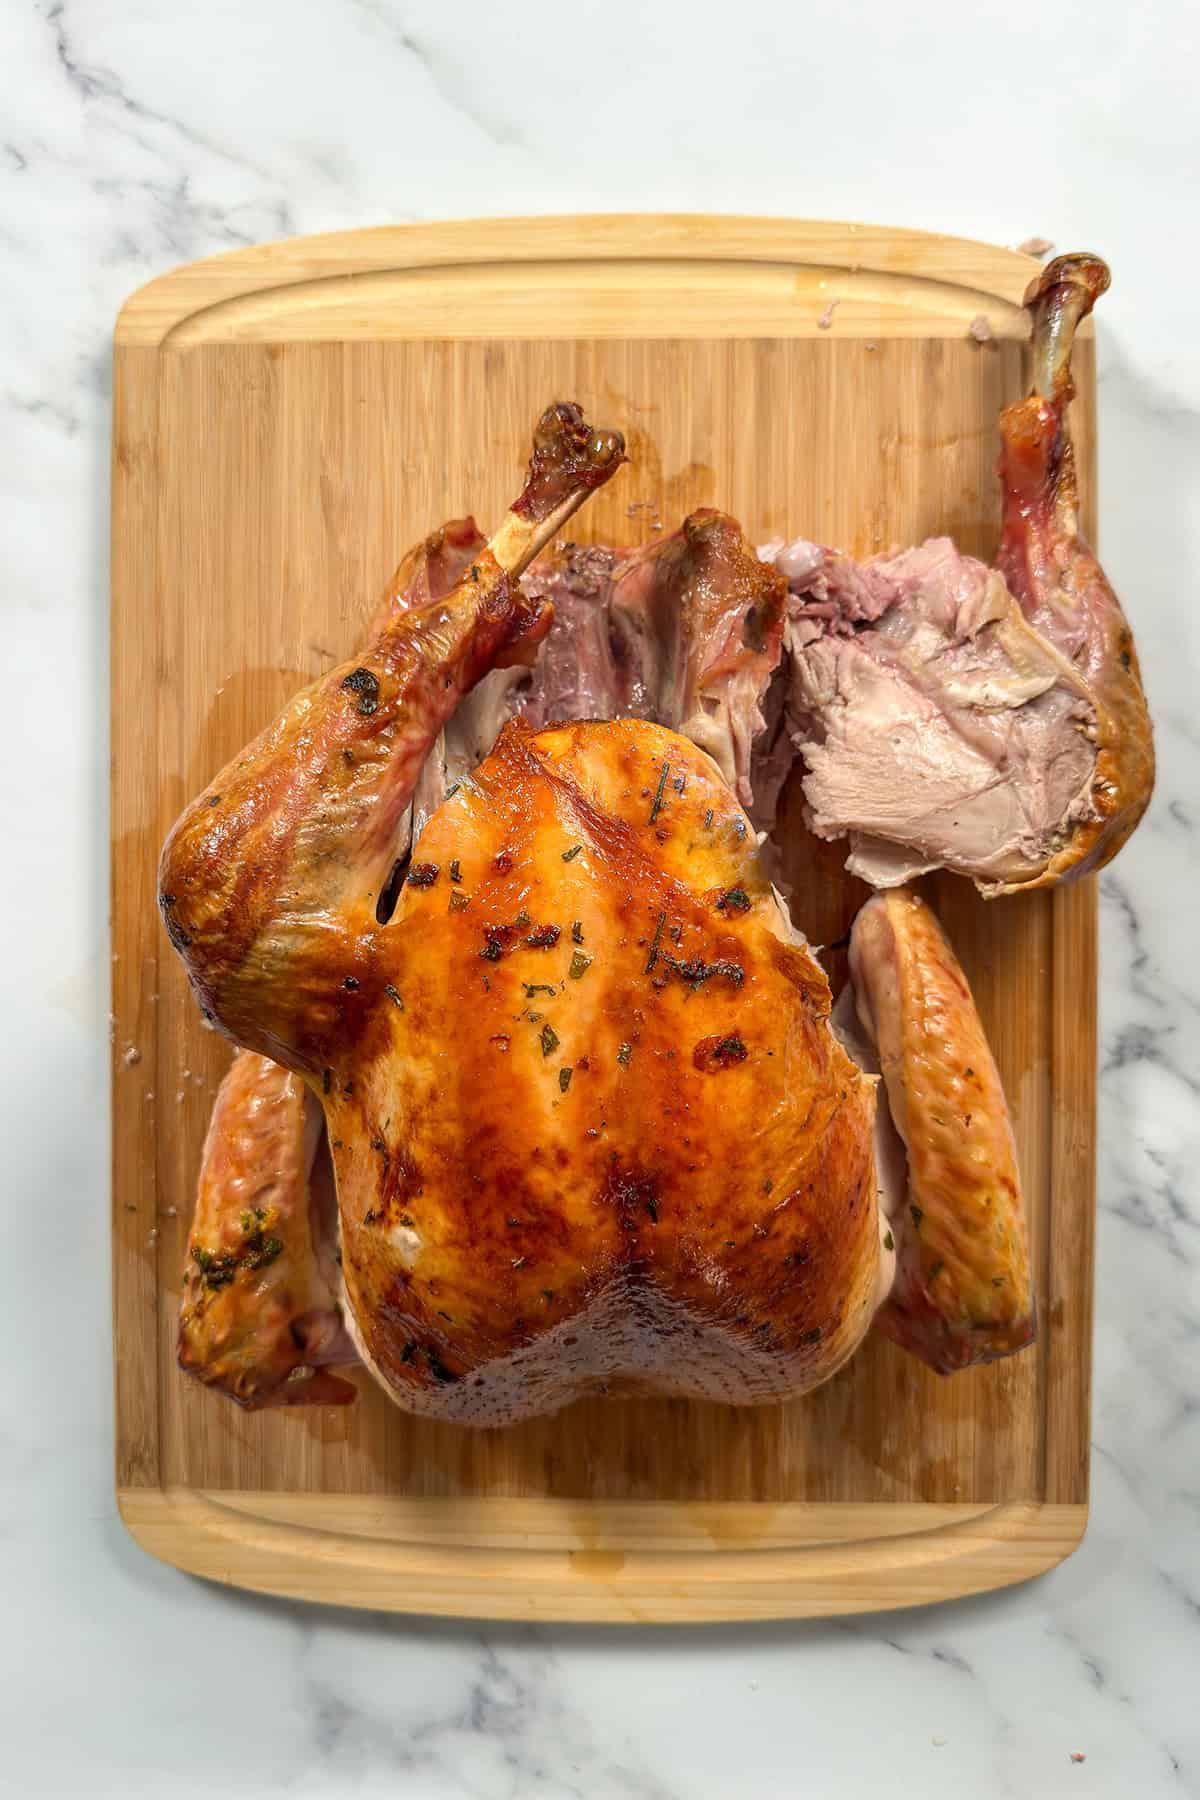
- Step 1: Slice through the skin between the breast and the leg quarter. Then press the leg downward until the joint pops. Slice through the joint and along the backbone to remove the leg/thigh section.
- Step 2: Repeat for the left leg and thigh section.
- Step 3: Pull each wing gently away from the body. Slice through the skin and joint where it attaches near the breast.
- Step 4: Repeat on the left side until both wings are removed. You can clip the wing tips for gravy if desired, and serve the drummettes on the platter.
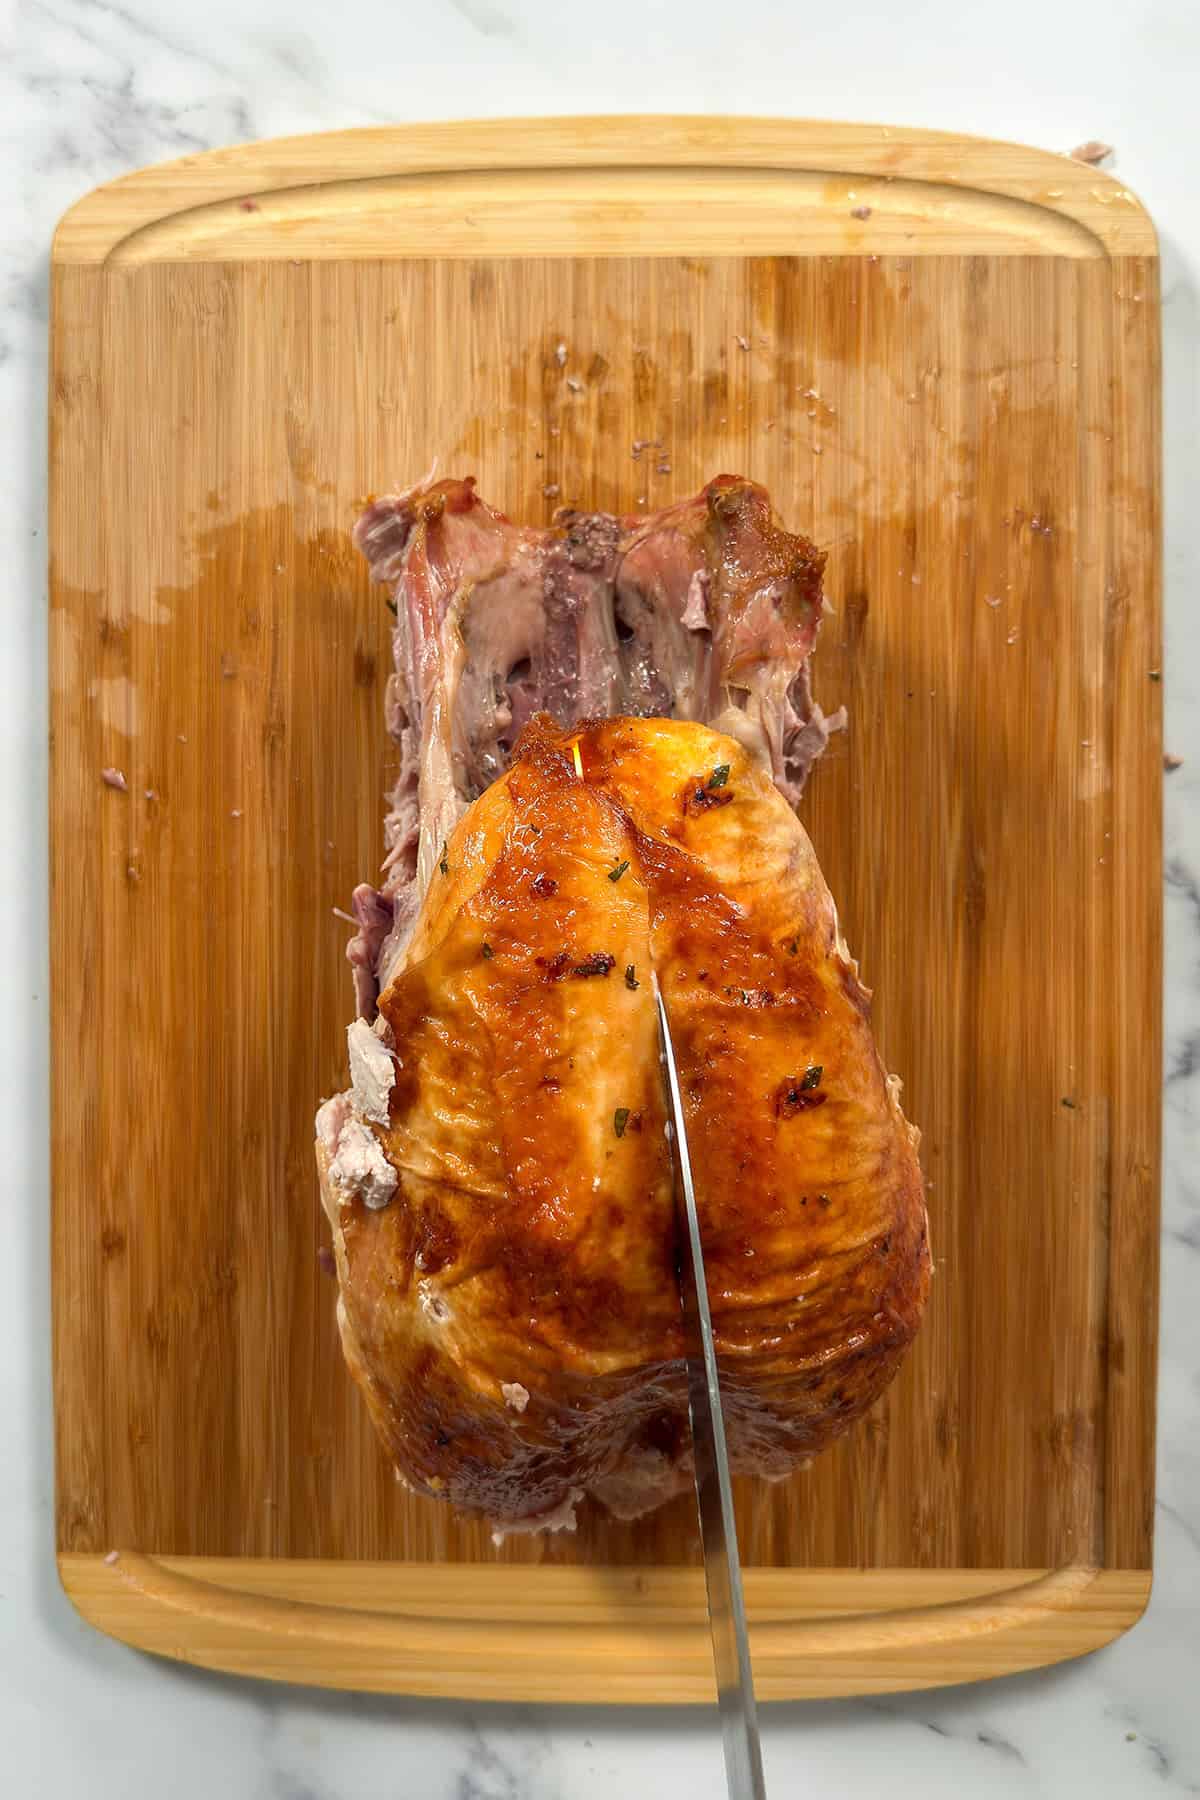
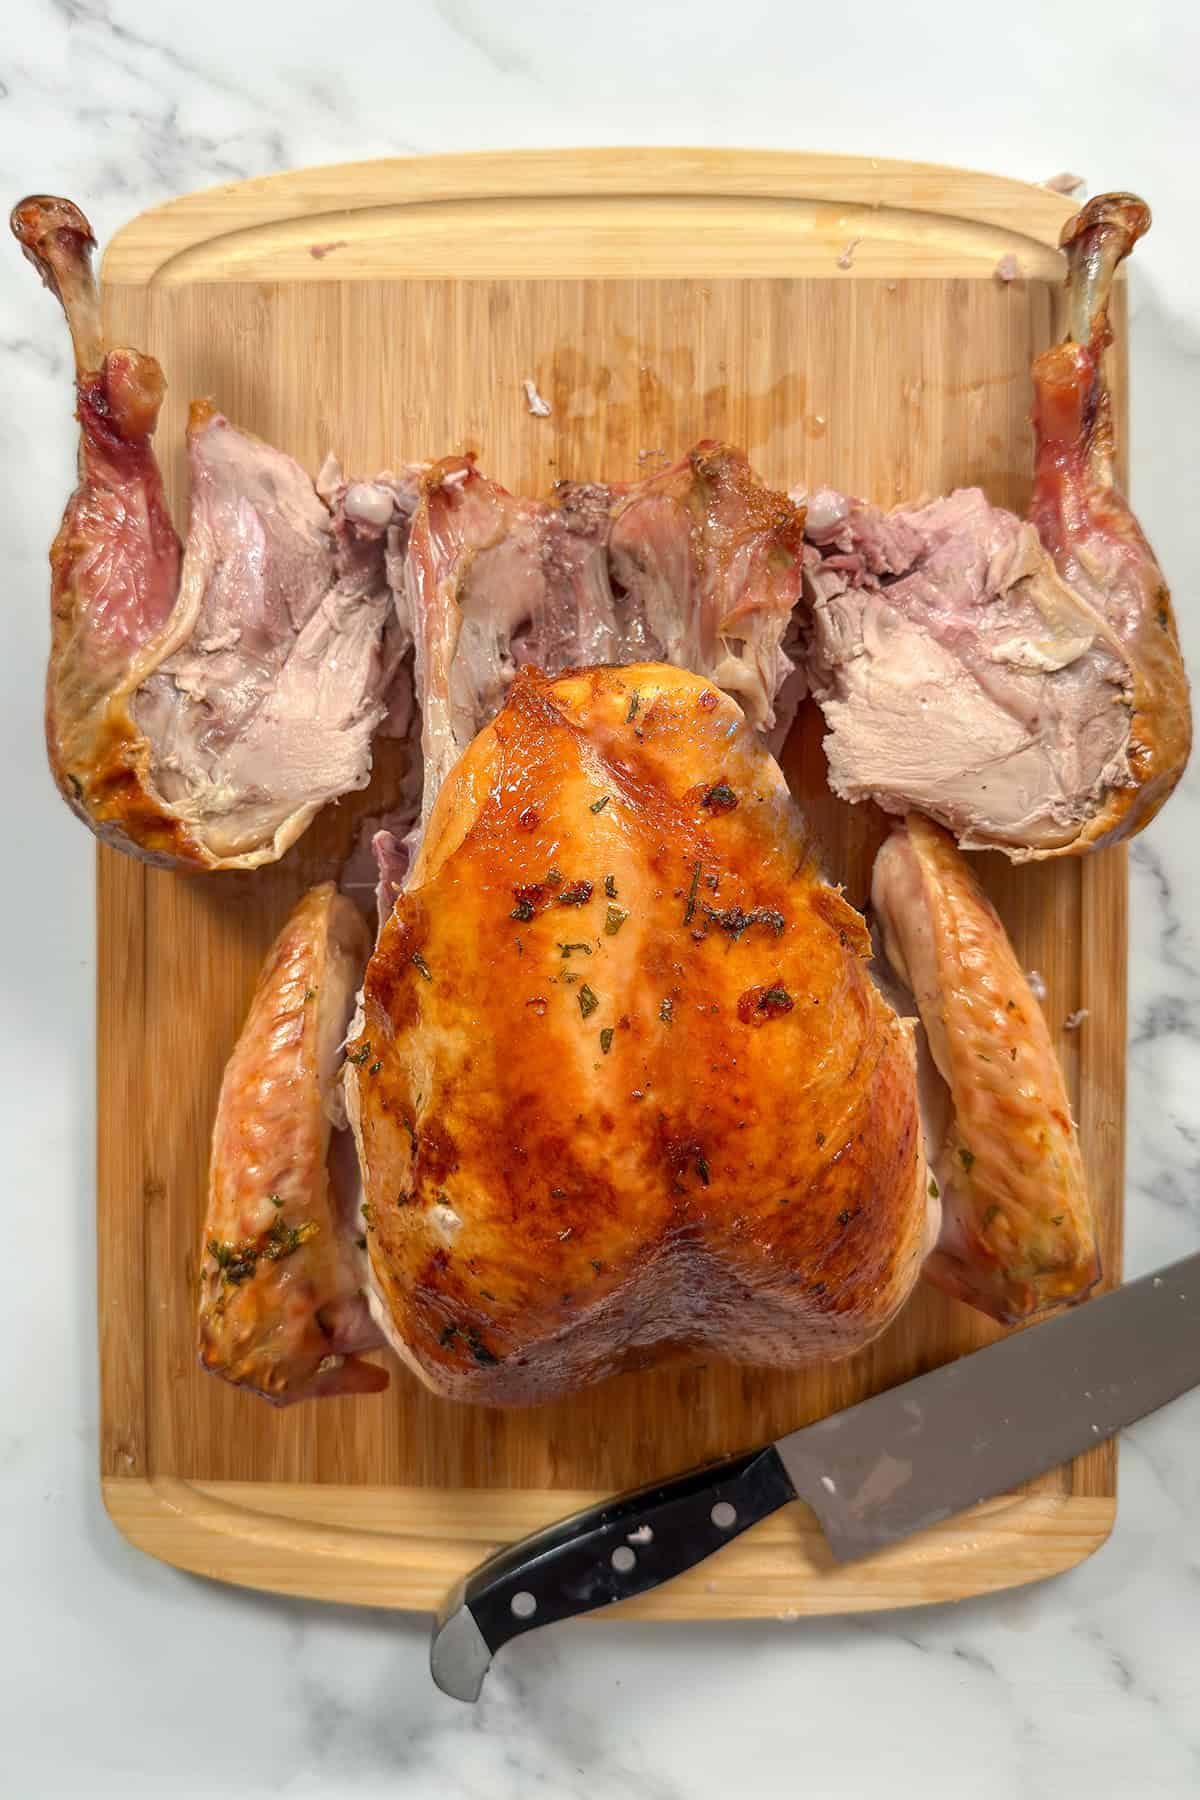
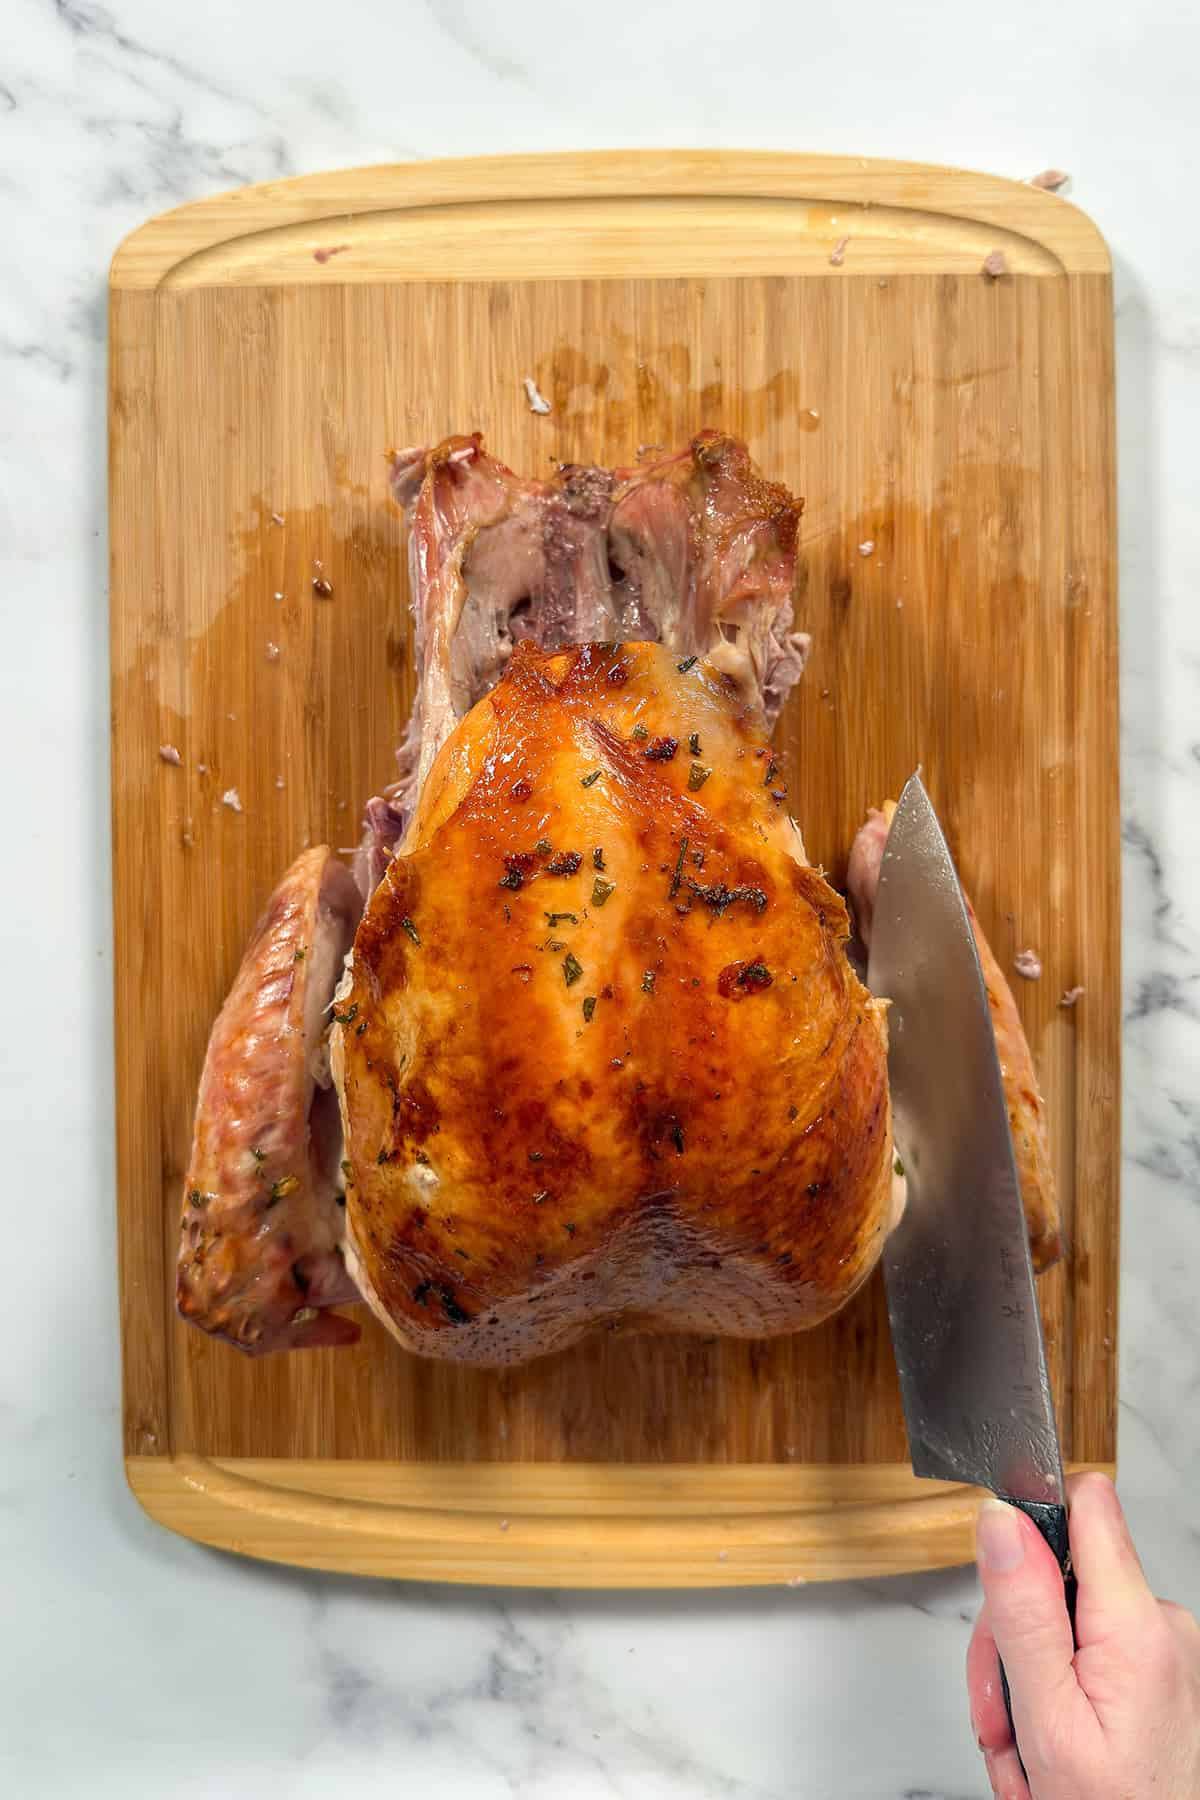
- Step 5: Locate the keel bone that runs down the center of the turkey. Slice along one side of the bone through the skin.
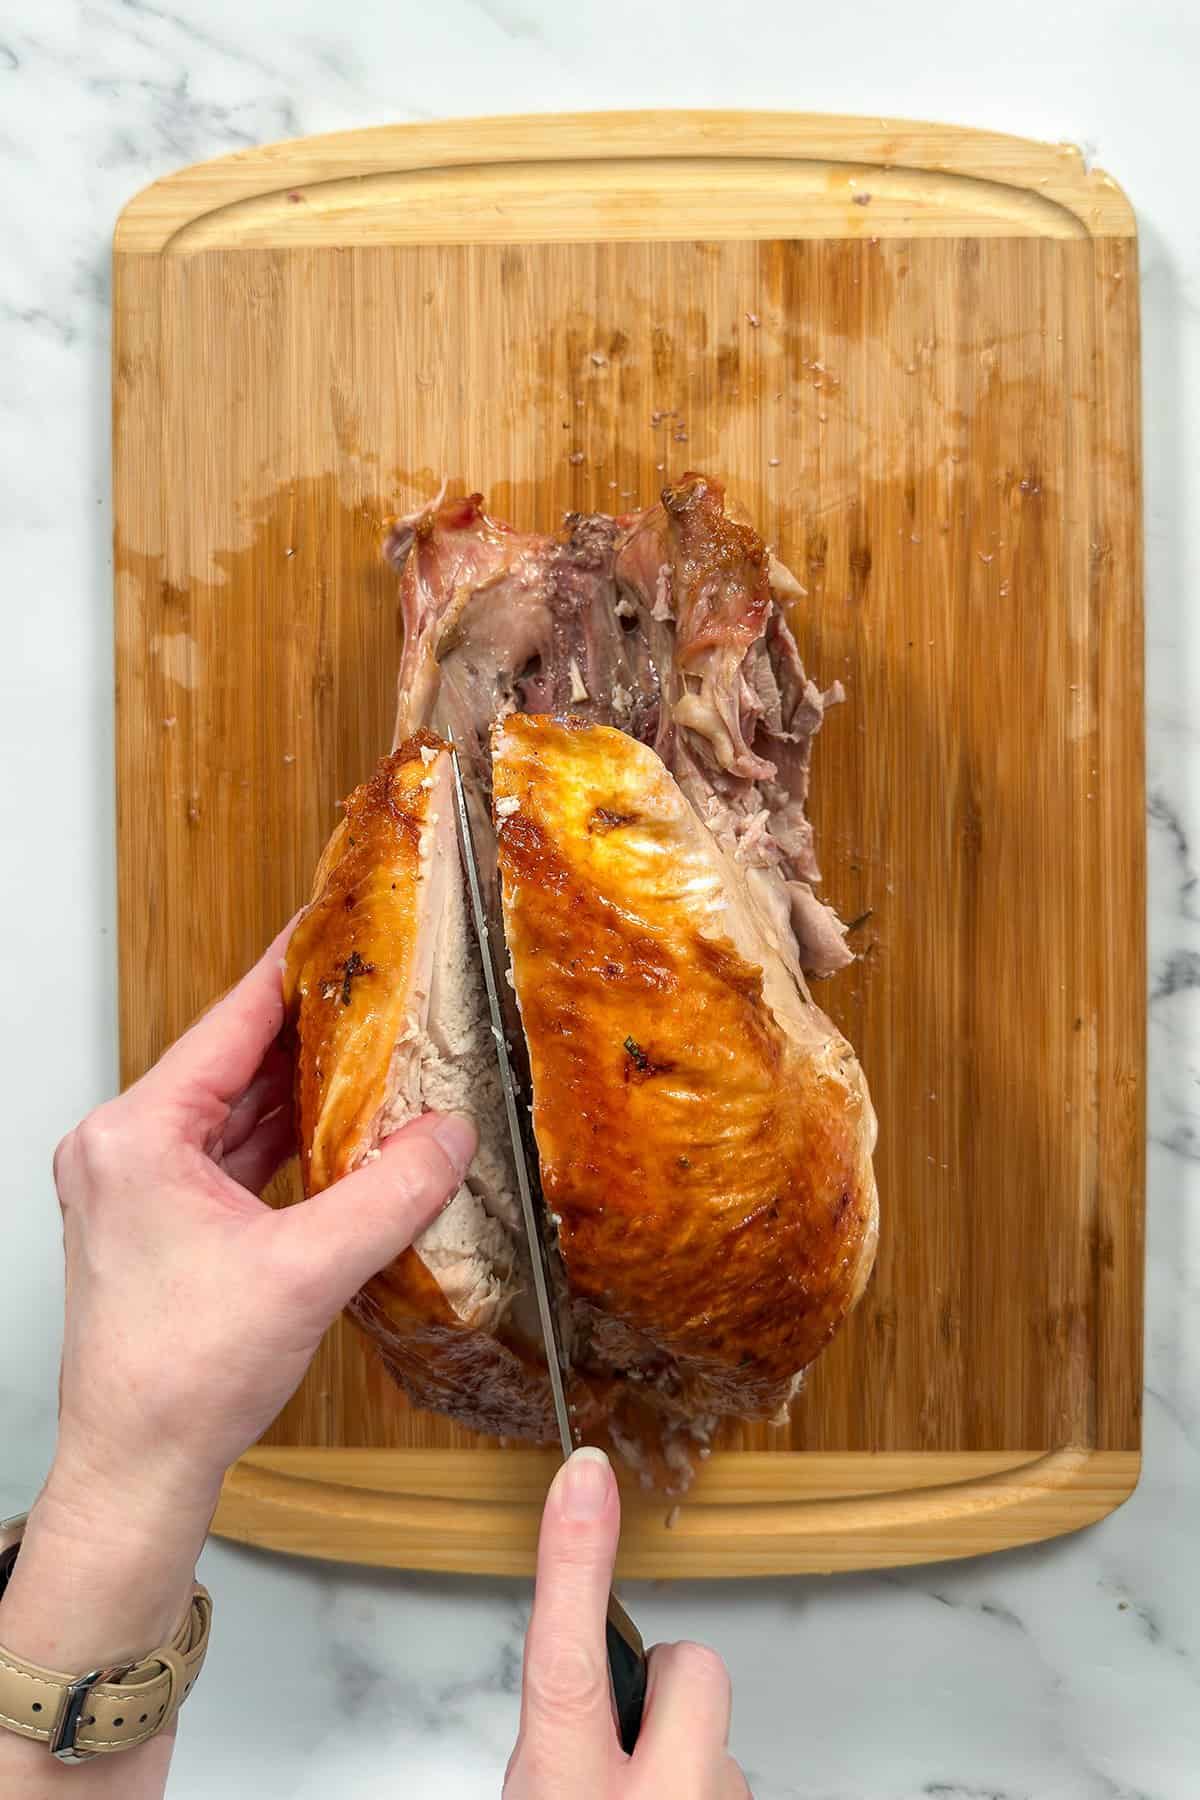
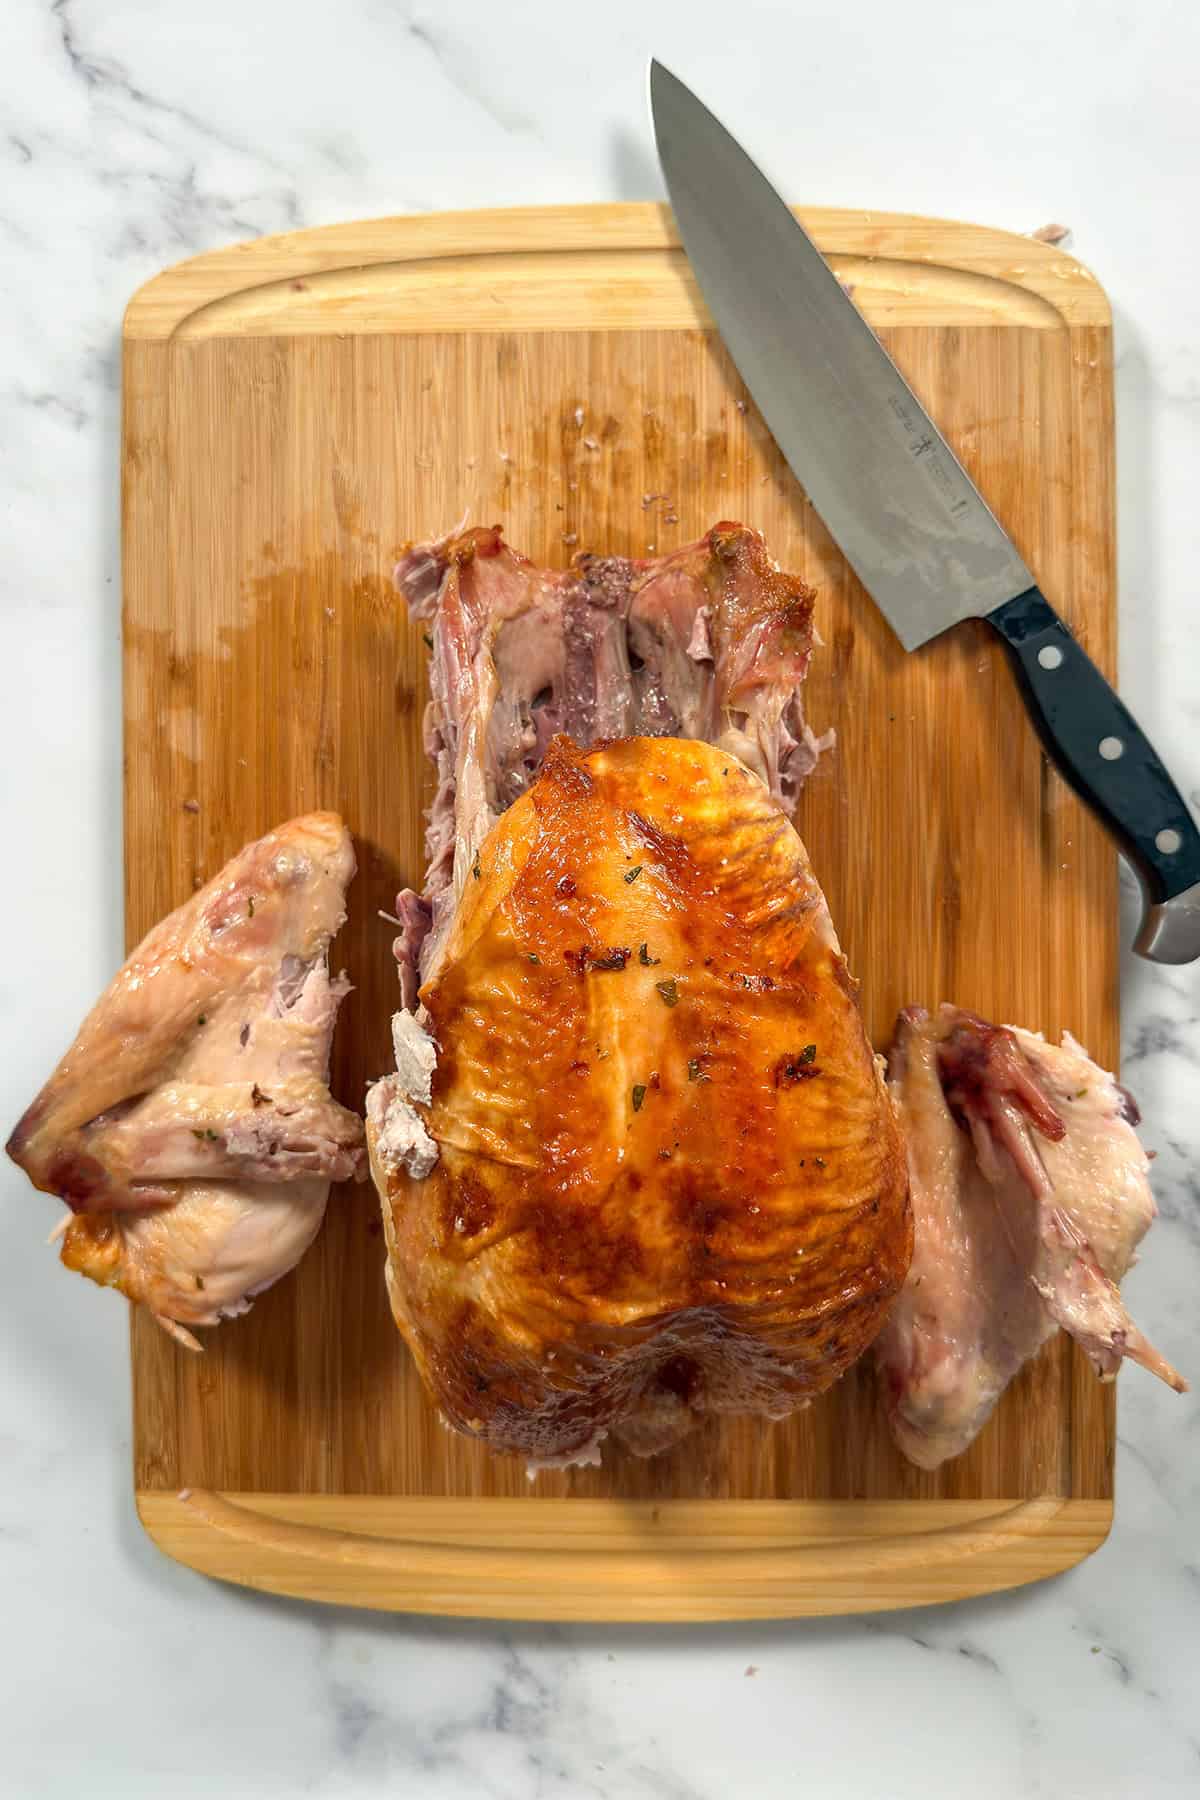
- Step 6: Use long strokes to release the breast meat, staying close to the ribcage. Remove in one whole piece then repeat on the second side.
How to Slice Turkey Breast and Thighs

- Step 1: Separate the Drumstick and Thigh. Place the leg/thigh skin-side down. Then bend the drumstick away from the thigh to reveal the joint and slice through the joint cleanly. Repeat with the second piece.
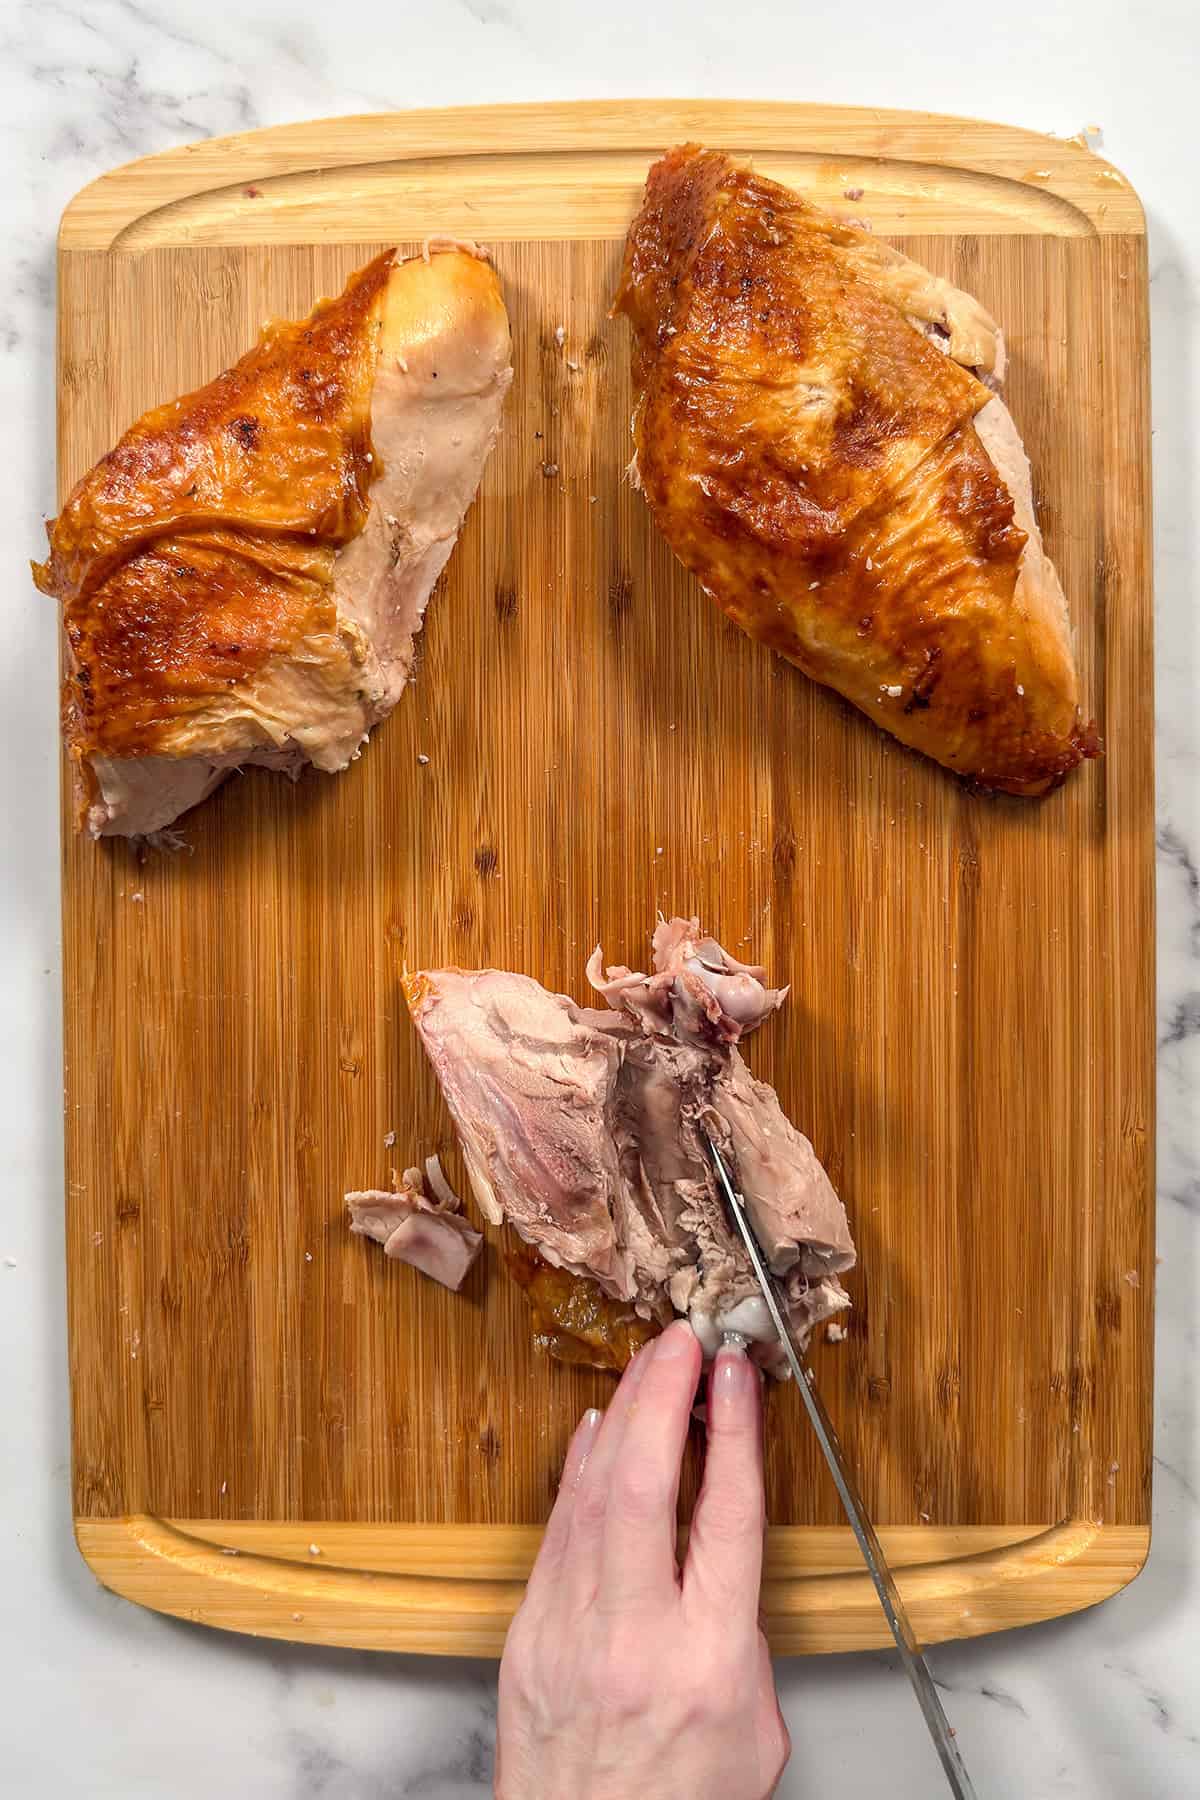
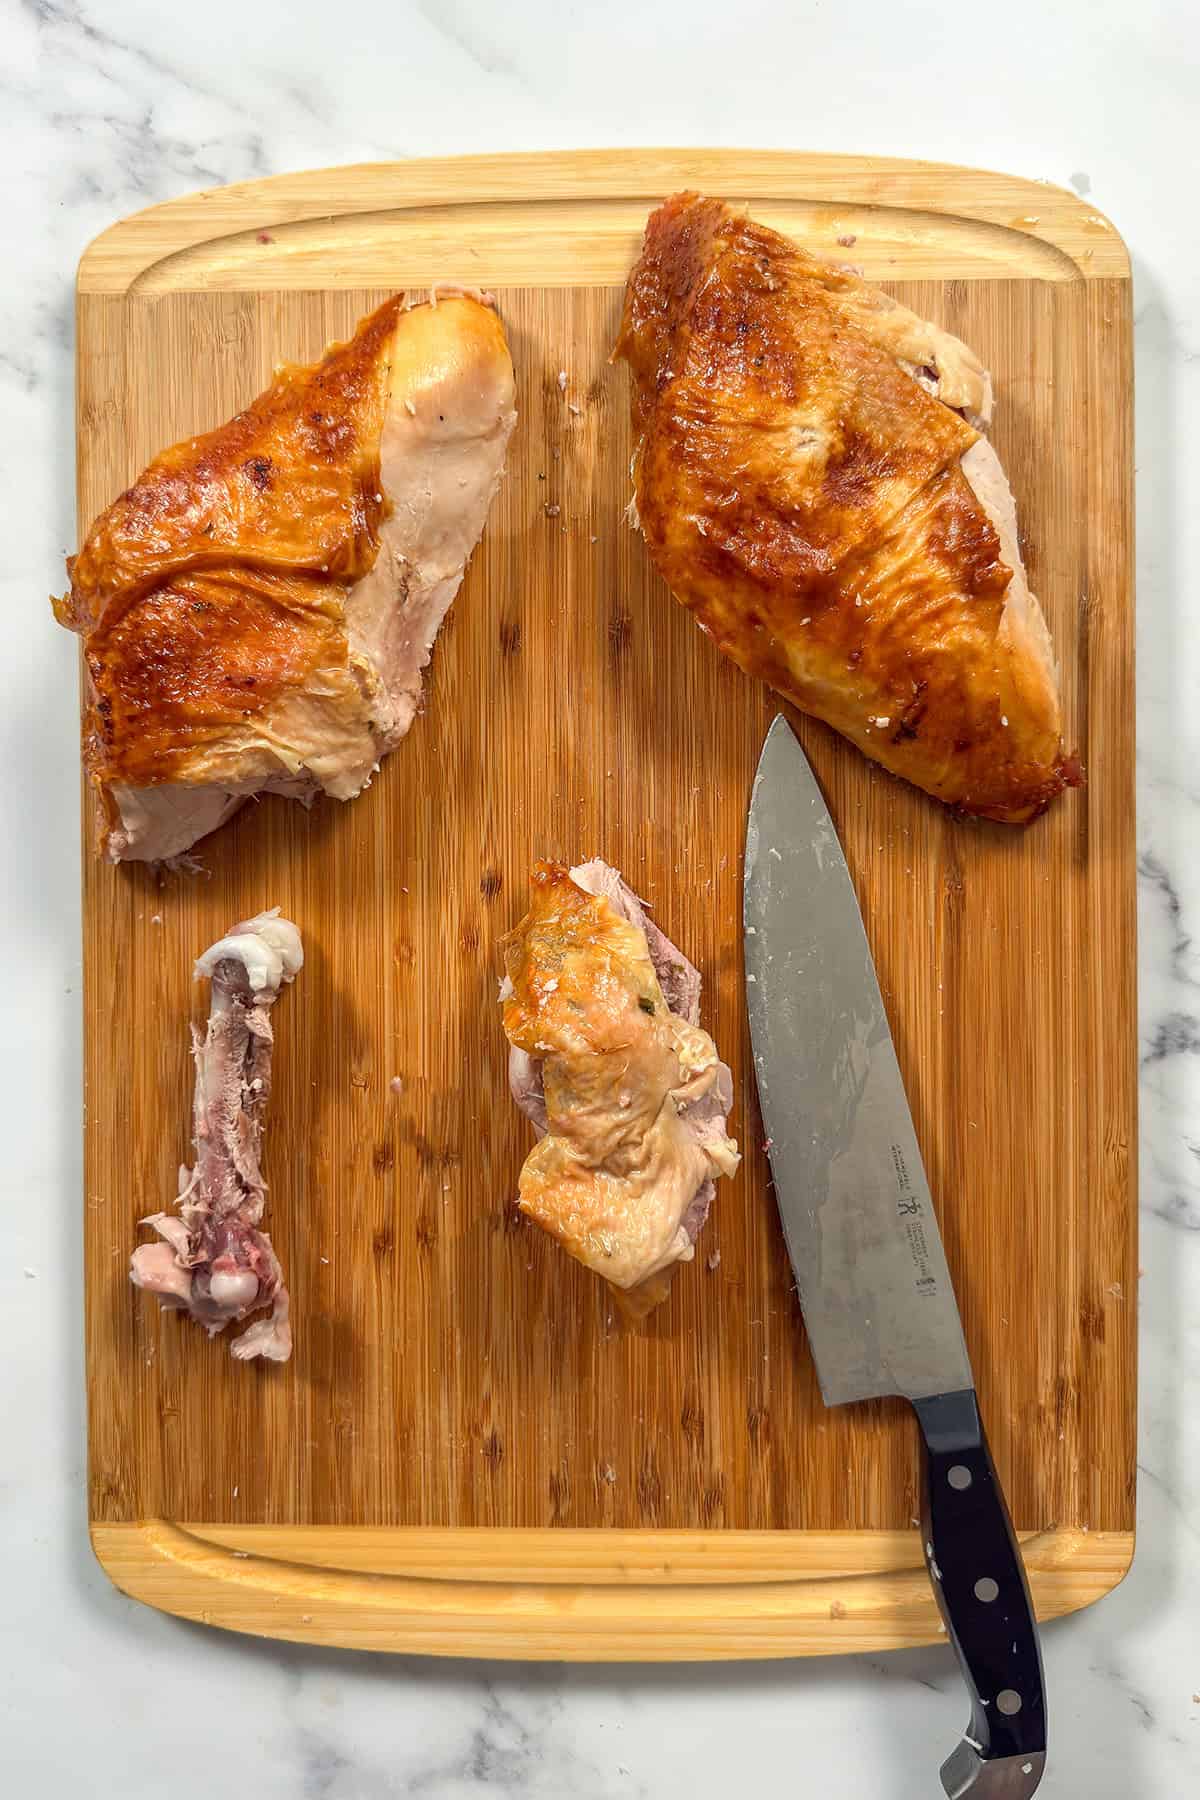
- Step 2: Remove the Thigh Bone. Slice along both sides of the thigh bone and lift it out (save for turkey stock).
- Step 3: Slice the Turkey Thigh. Hold the skin in place and slice the thigh meat against the grain.
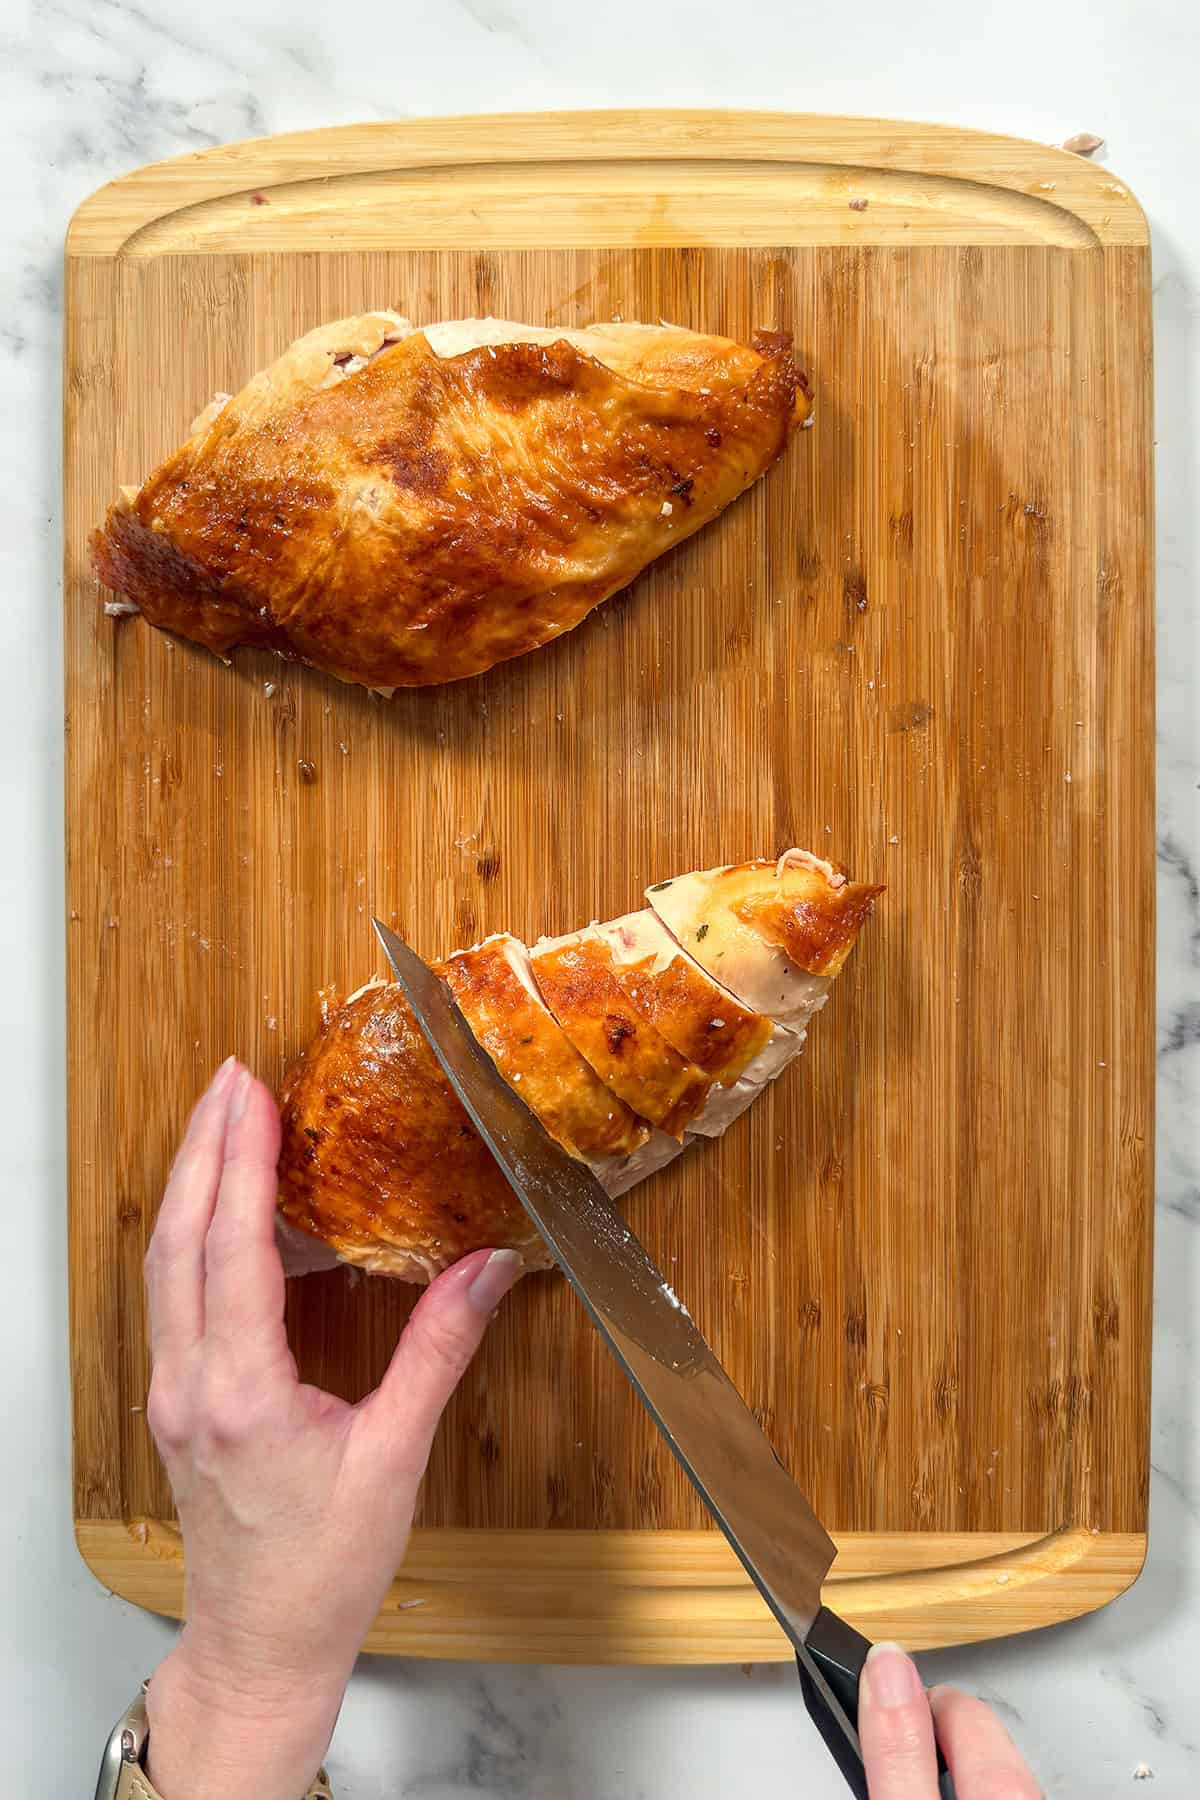
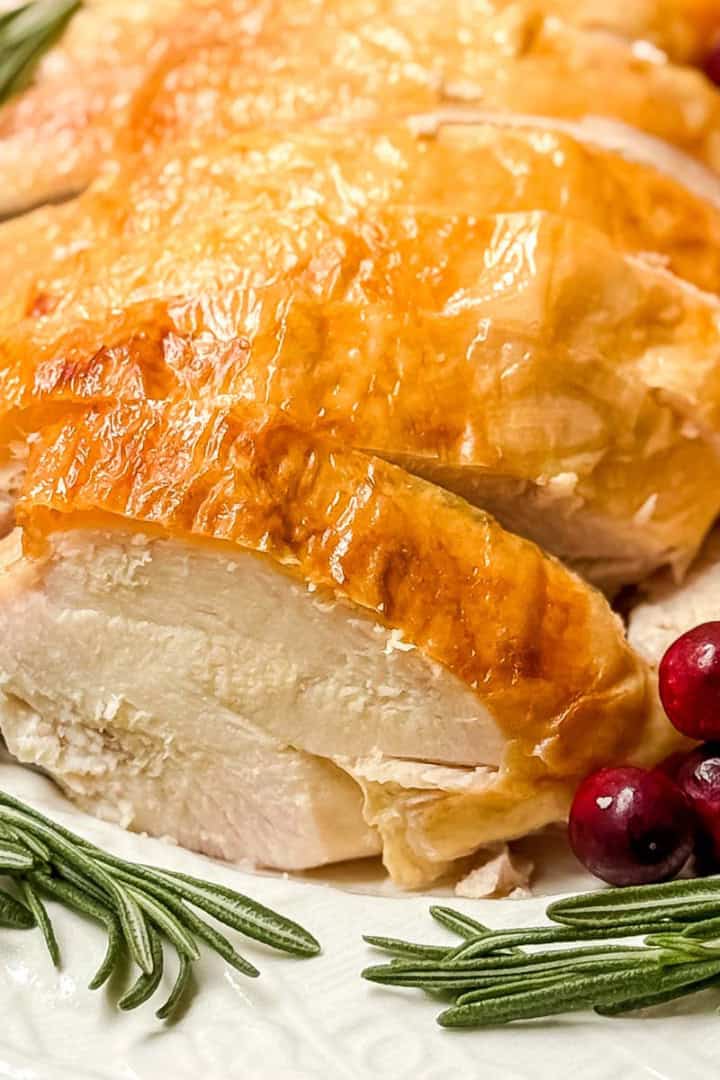
- Step 4: Slice the Breast Meat. Place the whole turkey breast on the board, skin-side up. Cut crosswise into ½-inch slices, and keep the skin on each slice when possible.
How to Carve a Turkey Breast Only
Perfect for small Thanksgiving gatherings or when roasting a turkey breast instead of a whole bird.
- Remove the breast from the bone using long, smooth strokes.
- Turn the breast skin-side up.
- Slice crosswise into ½-inch pieces.
- Arrange slices, keeping the skin on top.
Carving a Spatchcock Turkey
A spatchcocked turkey cooks more evenly and quickly - and carving it is simple:
- Remove the legs/thigh quarters first.
- Remove the wings as usual.
- Lift each breast section and slice crosswise.
- Because the backbone is removed before roasting, carving is even easier.
How to Carve a Smoked Turkey
Smoked turkey meat is slightly firmer and sometimes drier.
- Use a sharp knife and thinner slices.
- Follow the same method (legs → wings → breasts).
- Keep the slices moist by covering with foil until serving.
Carving for a Buffet vs. Sit-Down Dinner
Whether you're serving a holiday buffet or a sit-down Thanksgiving dinner or Christmas dinner, here's how to carve the roast turkey for both.
For Buffet-Style Serving
- Slice both white and dark meat slightly thinner (¼-⅓ inch).
- Keep the platter tightly packed to retain heat.
- Set out a small dish of warmed broth for guests to moisten pieces if desired.
For a Sit-Down Dinner
- Slice the turkey breast thicker (½-inch).
- Plate the white and dark meat separately for easy serving.
- Add turkey gravy to each plate or serve tableside.
Why It's Best to Carve the Turkey in the Kitchen (Not at the Table)
While the Norman Rockwell moment of carving at the table is iconic, carving in the kitchen gives you:
- A stable surface
- Cleaner, more even slices
- Protected skin (the prettiest part!)
- Less juice on the table
- Calmer, more enjoyable meal
A beautifully arranged platter brought to the holiday table is far more impressive than carving in front of a crowd.
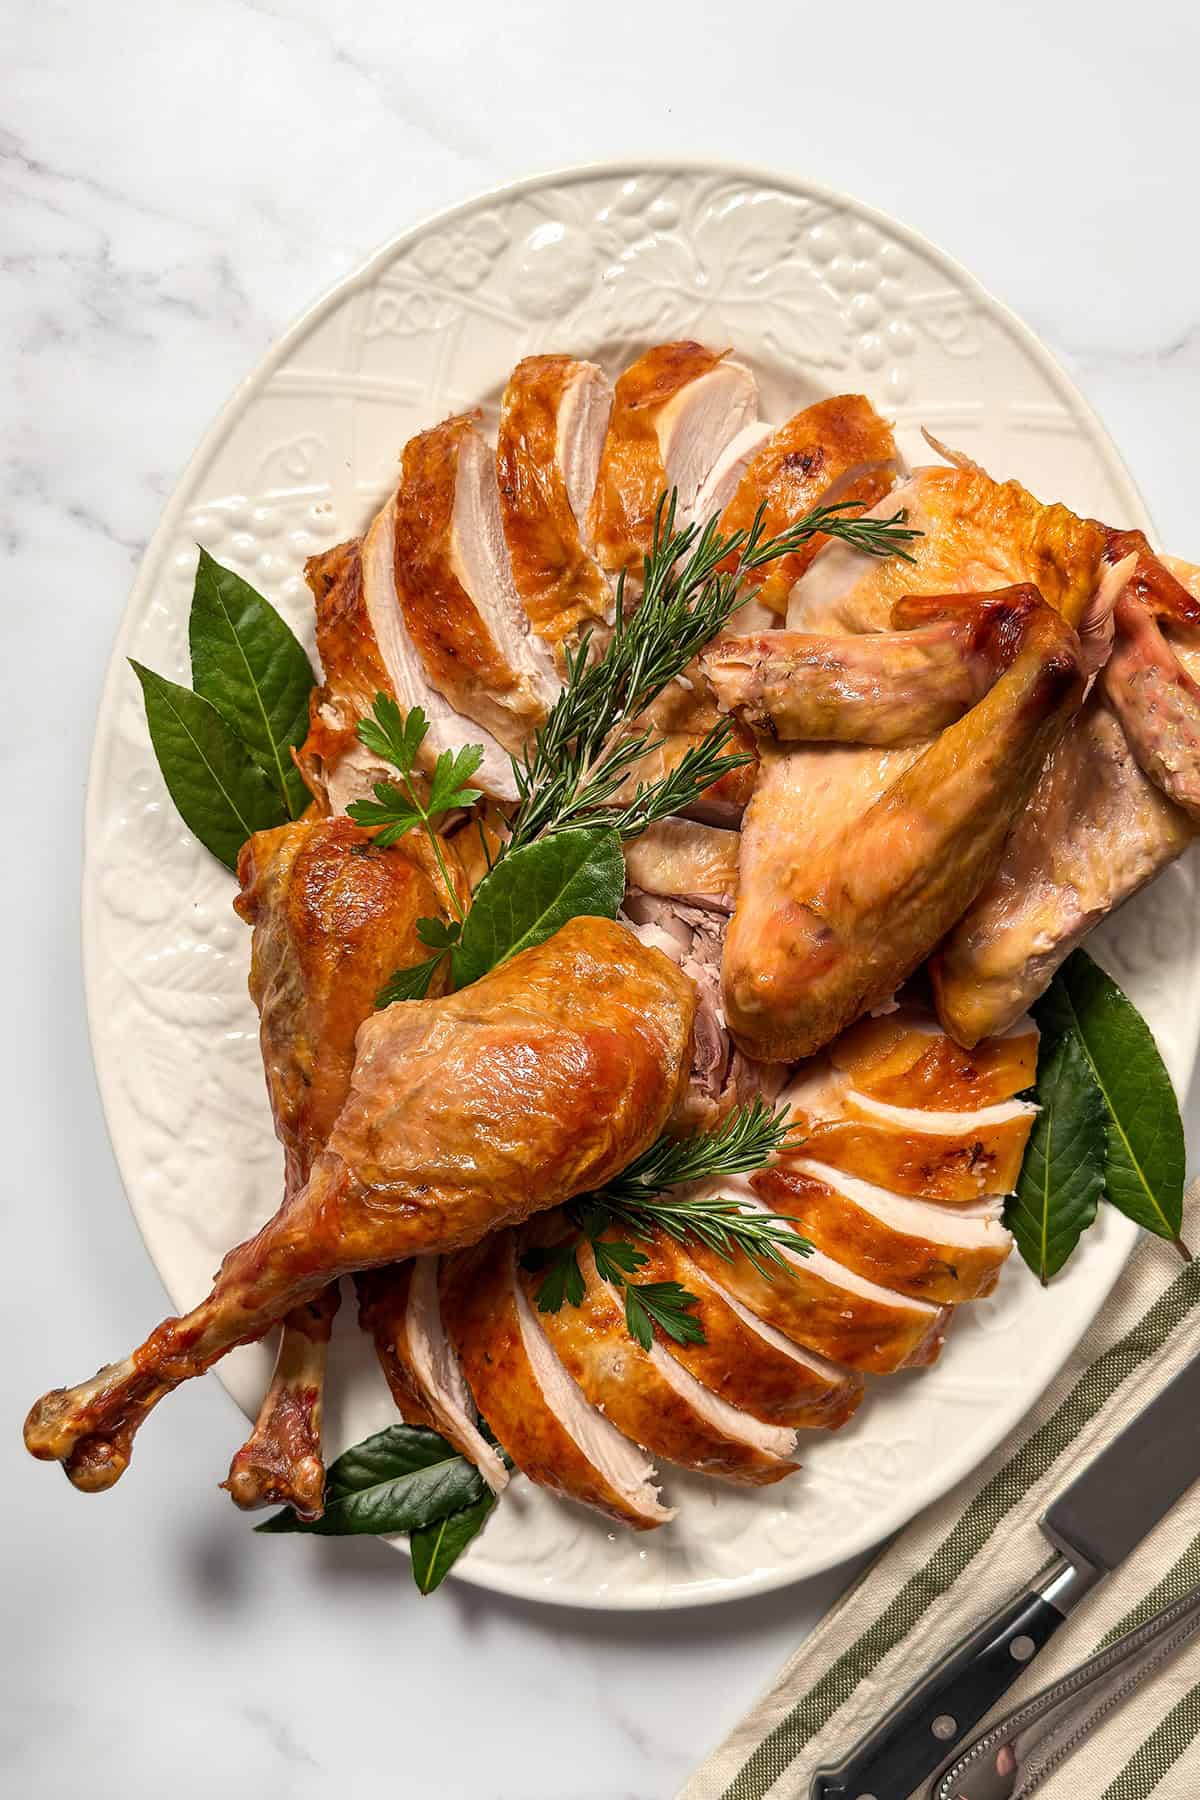
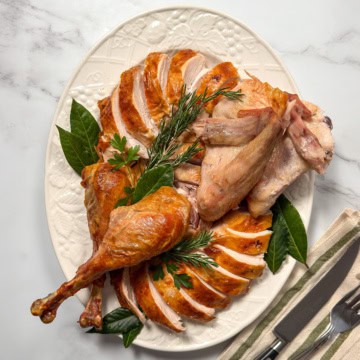
How to Arrange the Turkey on a Platter
Create a presentation that feels festive and abundant.
- Place sliced thigh meat in the center.
- Fan breast slices along both sides.
- Cross drumsticks decoratively near the back of the platter.
- Add wings on the opposite end.
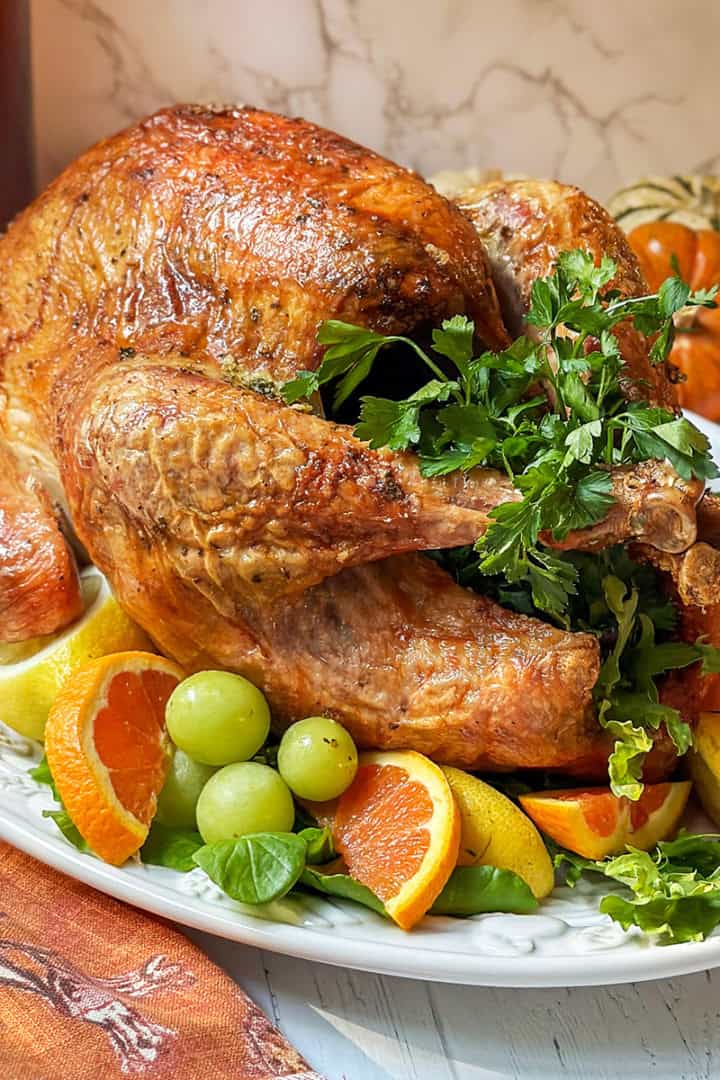
- Garnish with fresh herbs, citrus slices, pomegranate seeds, grapes, figs, or cranberries.
What to Do With the Turkey Carcass
Don't toss it! The carcass, bones, and wing tips make an incredibly flavorful homemade stock. Here's my favorite turkey stock recipe, which I make every year.
Turkey Storage & Food Safety
- Refrigerate carved turkey within 2 hours.
- Store leftovers in an airtight container for 3-5 days.
- Freeze slices for up to 3 months.
- To reheat, add a splash of broth and warm gently until heated to 165°F.
From a Private Chef: Pro Secrets for Perfect Turkey Carving
After years of catering holiday dinners, these are my go-to secrets:
- For large gatherings, carve both breasts whole first before slicing - it keeps plating smoother.
- Always carve in the kitchen - you'll get cleaner cuts and a prettier platter.
- Angle the knife slightly inward when slicing breast meat for even, elegant strips.
- Keep a warm oven (170°F) ready to hold the platter if needed.
- Slice only what you need and cover the rest to keep it moist.
Turkey Carving FAQs
A turkey should rest for 20-30 minutes before carving. This allows the juices to redistribute so the slices stay moist and tender. Larger turkeys (over 16 pounds) may benefit from up to 45 minutes of resting time.
For the best texture and presentation, slice the turkey breast ½ inch thick. Thinner slices are ideal for buffets, while thicker slices work well for plated dinners.
A sharp carving knife or chef's knife works best. Use long, smooth strokes rather than sawing motions. Avoid serrated knives unless necessary-they can tear the skin and shred the meat.
Yes! You can carve the turkey up to 1 hour ahead of serving. Arrange the slices on a platter, cover tightly with foil, and keep it warm in a 170°F oven or warming drawer. Add a splash of broth before serving to keep everything juicy.
Carve only what you need, and keep the remaining breast pieces whole until ready to slice. For serving, drizzle a little warm broth or gravy over the slices or keep the platter covered with foil to retain moisture.
Make sure the skin is dry and well-rested. Use long, confident strokes and hold the skin gently in place as you slice. Keeping the breast whole before slicing also helps preserve the skin.
Save it! The carcass makes incredibly flavorful homemade stock. Add the bones, leftover skin, wing tips, and aromatics to a pot and simmer into a rich broth. If you don't have time to make the stock right away, the carcass freezes well for later.
You don't have to, but removing it before slicing the breasts can make the process smoother. It pulls out easily once the turkey is cooked and rested.
This usually happens when the turkey wasn't rested long enough, or the knife is dull. Allow a full rest time and use long, smooth motions rather than sawing.
Roast Turkey Recipes
Now that you know how to carve a whole roasted turkey or turkey breast, here are some of my favorite roast turkey recipes you'll love:

If you try this recipe, I'd love to hear your comments and consider giving it a 5-star rating. Explore the recipe index for more easy, delicious ideas, and stay updated by subscribing to our newsletter and following us on Facebook, Pinterest, Instagram, and YouTube!
Want to save this recipe?
Enter your email, and we'll send it to your inbox. Plus, you'll get delicious new recipes from us every Friday!
How to Carve a Turkey (Step-by-Step)
Ingredients
- 1 roasted turkey
Instructions
- Prepare the turkey: Place the turkey breast side up on a large cutting board with the legs facing you. Have a sharp knife, paper towels for cleanup, and a serving platter nearby. If you've trussed the bird, remove and discard the butcher's twine.
- Remove the legs and thighs: With the turkey's neck facing you, use a sharp carving knife to cut through the skin connecting the breast and leg quarters. Then press it down onto your cutting board; you may hear a small pop. Use the knife to cut through the joint and the skin along the backbone to remove the leg and thigh piece. Repeat on the other side.
- Remove the wings: Gently pull the wings away from the breast and cut through the skin and the joint near the breast. This will release the wing. You can serve the whole wing, or remove the wing tip (the flat part) for gravy. Repeat for the other side.
- Remove the breasts: The keel bone runs down the center of each breast. Use your knife to slice the skin down the length of the turkey. Beginning on one side of the bone, begin cutting the breast meat from the bone with long strokes instead of a sawing motion. Stay close to the bone and continue cutting until the whole breast is released. Repeat on the other side.
- Separate the drumstick from the thigh: Place the leg and thigh skin side down on the board. Bend the drumstick away from the thigh to expose the joint, then cut through it to separate the two. Repeat with the second drumstick and thigh.
- Carve the thigh meat: Using the tip of the knife, cut along both sides of the thigh bone and remove (save this for turkey stock!). If the thigh meat stays intact, hold the skin in place and slice pieces against the grain.
- Carve the breast meat: Place the breasts on the cutting board and slice crosswise into ½ inch thick slices, keeping the skin if possible.
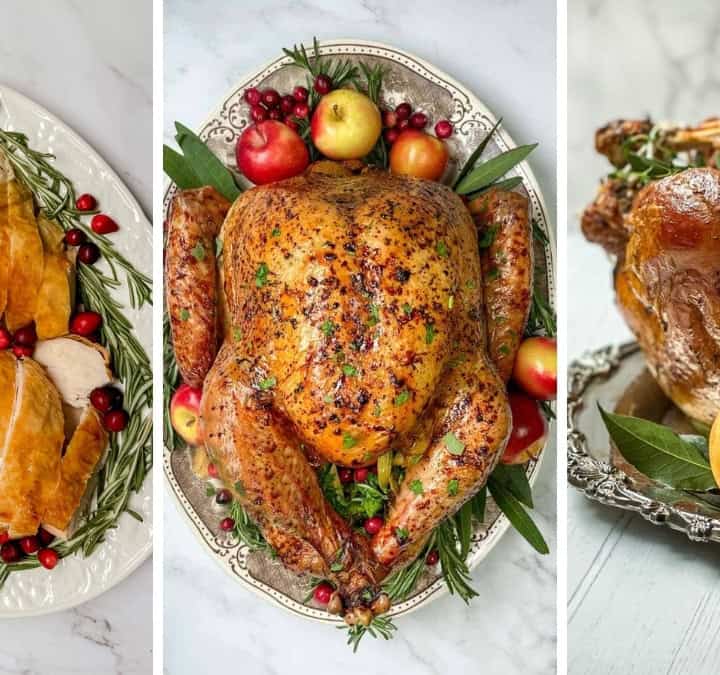
- Serving the turkey meat: Begin by placing the sliced thigh meat in the center of the platter. Then arrange the breast slices along the edges of the platter and fan them slightly. On opposing sides of the dish, lay the legs, crossed at the bone tip on one side and the wings on the other. Garnish the platter and serve!
Notes
- Let the turkey rest for at least 20-30 minutes before carving. This keeps the slices juicy and easy to cut.
- Use long, smooth strokes-avoid sawing motions for cleaner slices and to keep the skin intact.
- Carve in the kitchen, not at the table, for better control and presentation. A prepared platter is always more elegant and far less stressful.
- Save the carcass and any leftover bones to make homemade turkey stock.
- Slice only what you need and keep remaining pieces covered to stay moist.
- Garnishing options: On the turkey serving platter, garnish with edible elements. Fresh herbs like rosemary, thyme, sage, parsley, and bay leaves are as easy and attractive a choice as sliced citrus, figs, and fruits make a pretty presentation.
- Storing carved turkey: Refrigerate leftovers in an airtight container for up to 5 days. Don't let it sit at room temperature for more than 2 hours from the time it exits the oven to storage for food safety.
Nutritional information is only an estimate. The accuracy of the nutritional information for any recipe on this site is not guaranteed.
I have been cooking turkeys for many years, but I must tell you how great your Step by Step instructions and photos are. Thank you so much for your hard work in putting this together!
You made my day! Thank you so much for your sweet comment!! Happy Thanksgiving 🍁.
Carving a turkey can sometimes seem intimidating- but it’s easy when you follow a few simple steps. This easy tutorial shows you how.