
Peanut Butter Chocolate Chip Spider Cookies
This post may contain affiliate links. Please read our disclosure policy.

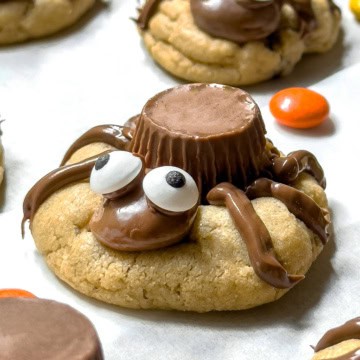
Peanut Butter Chocolate Chip Spider Cookies are a fun way to celebrate October and Halloween. These not-so-spooky treats are fun to make and so, so yummy. The cookie base is a soft and chewy peanut butter chocolate chip cookie, and the spiders are made with classic trick-or-treat candies like mini peanut butter cups and Milk Duds!
If you love Halloween cookies, our Monster Cookies are also a not-so-scary, silly kind of delicious treat!

What I Love About These Spider Cookies
It's early in the season, but it's never too early to plan treats for the kids, co-workers, and neighbors! And these are easy, easy, easy.
It's always cookie season at our house. And often, the requests vary from peanut butter cookies to chocolate chip cookies. Then, there are times when everyone is requesting both. And there is NOT a better combination than peanut butter and chocolate!
In fact, if I splurge on October 31st-- it will always be with a chocolate peanut butter cup!
So these cute cookies combine both and are a fuss-free and fun way to celebrate the month!
Jump to:
Key Ingredients
You will find ingredient measurements in the recipe card at the bottom of this post, but here's what you need to make these oh-so-cute cookies:

- Butter: Salted butter adds depth of flavor, though unsalted can be used if you prefer to control the salt.
- Brown sugar: Gives the cookies their soft, chewy texture and a subtle caramel note.
- Peanut butter: Both creamy and chunky work, but creamy peanut butter keeps the texture smooth since the cookies already have chocolate chips and candy decorations.
- Egg: Binds the dough and helps the cookies hold their shape.
- Vanilla extract: Enhances the peanut butter and chocolate flavors.
- All-purpose flour: The base of the dough; be sure to measure correctly for the best results.
- Baking soda + salt: Provide lift and balance the sweetness.
- Mini chocolate chips: Perfect for bite-sized cookies, but regular chocolate chips can be swapped in if that's what you have on hand.
Spider Decorations
Now, for the fun part! All you need is some classic Halloween candy. Here's what I used to make these not-so-spooky spiders -be creative and see what you come up with. I'd LOVE to see!
- Mini peanut butter cups (like Reese's) for the spider body -one for each cookie.
- Milk Duds for the head-- one for each cookie
- Mini candy eyes -you will want the small ones.
- Melted chocolate to draw spider legs and adhere the eyes to the Milk Dud head. You can melt chocolate chips or try chocolate hazelnut spread (like Nutella) for a quick fix that works well.

How to Make Halloween Spider Cookies
Step 1: Make the Cookies
Cream the butter with brown sugar and peanut butter until light and fluffy. Plan on doing this for about 2 minutes, as it gives these cookies a sweet, soft texture rather than a cakey peanut butter cookie texture.
Then add the egg and a good splash of vanilla and combine. Then, add the dry ingredients (flour, baking soda, and a pinch of salt) and stir until combined. Finally, fold in the chocolate chips. As mentioned, I prefer mini chocolate chips because the cookies are small.
Step 2: Bake the Cookies
Scoop the dough with a small cookie scoop (I'm using a 1-tablespoon cookie scoop) and roll it into balls. There is zero need to chill the cookie dough before baking. Yay!
Depending on the size of your cookies, they will bake between 8 to 10 minutes or just until set around the edges but still soft in the middle. Do you see the soft crinkles around the edges of these cookies? I adore them! When you take the baking sheet out of the oven, all you have to do is tap it on the counter a few times.

Step 3: Make the Spider Cookies
Now, for the fun part, let's make the spiders. Immediately after removing the cookies from the oven, take a mini peanut butter cup, turn it upside down near the center of the cookie, and place a Milk Dud in front of it for the head. When the cookies are still warm, the candy will melt a little into the cookie, helping the spider stay in place!
Then, melt chocolate chips (or, for a quick fix, use a chocolate-hazelnut spread) and add it to a sandwich-size baggie with the corner snipped off. Place a dab on the back of the candy eyes and put them on top of the Milk Dud. Then, "draw" three legs on either side of the cookie. That's it!
Variations
Since this is a fun holiday cookie, short and playful:
- Candy swap: Use different candies for eyes-mini M&Ms, Skittles, or candy pearls.
- Different peanut butter: For a stronger nutty flavor, try natural peanut butter (stir well before using).
- Bigger spiders: Make larger cookies and use full-size peanut butter cups for the "body."

Recipe FAQ's
Yes. These Peanut Butter Spider Cookies can be baked and decorated up to 2 days in advance. Store them in an airtight container at room temperature to keep them soft and chewy.
Chilling isn't required for Spider Cookies, but if your kitchen is warm or the dough feels sticky, chilling it for 20-30 minutes will help the cookies hold their shape and bake more evenly.
Yes, these Spider Cookies freeze well. For best results, bake and cool the cookies, then freeze them undecorated for up to 2 months. Thaw before adding the peanut butter cup "body," chocolate "legs," and candy eyes.
If you don't have mini chocolate chips, regular chocolate chips work too. You can also chop larger chips or use chocolate chunks; the cookies will still have plenty of chocolate flavor.
You can use natural peanut butter in Spider Cookies, but make sure it's well-stirred and not too oily. The cookies will spread more and may be softer than when made with classic creamy peanut butter.
More Halloween Treats You Might Also Love
- Crockpot Apple Cider
- Easy Halloween Treats to Make Now
- Easy One Pan Halloween Rice Krispie Treats
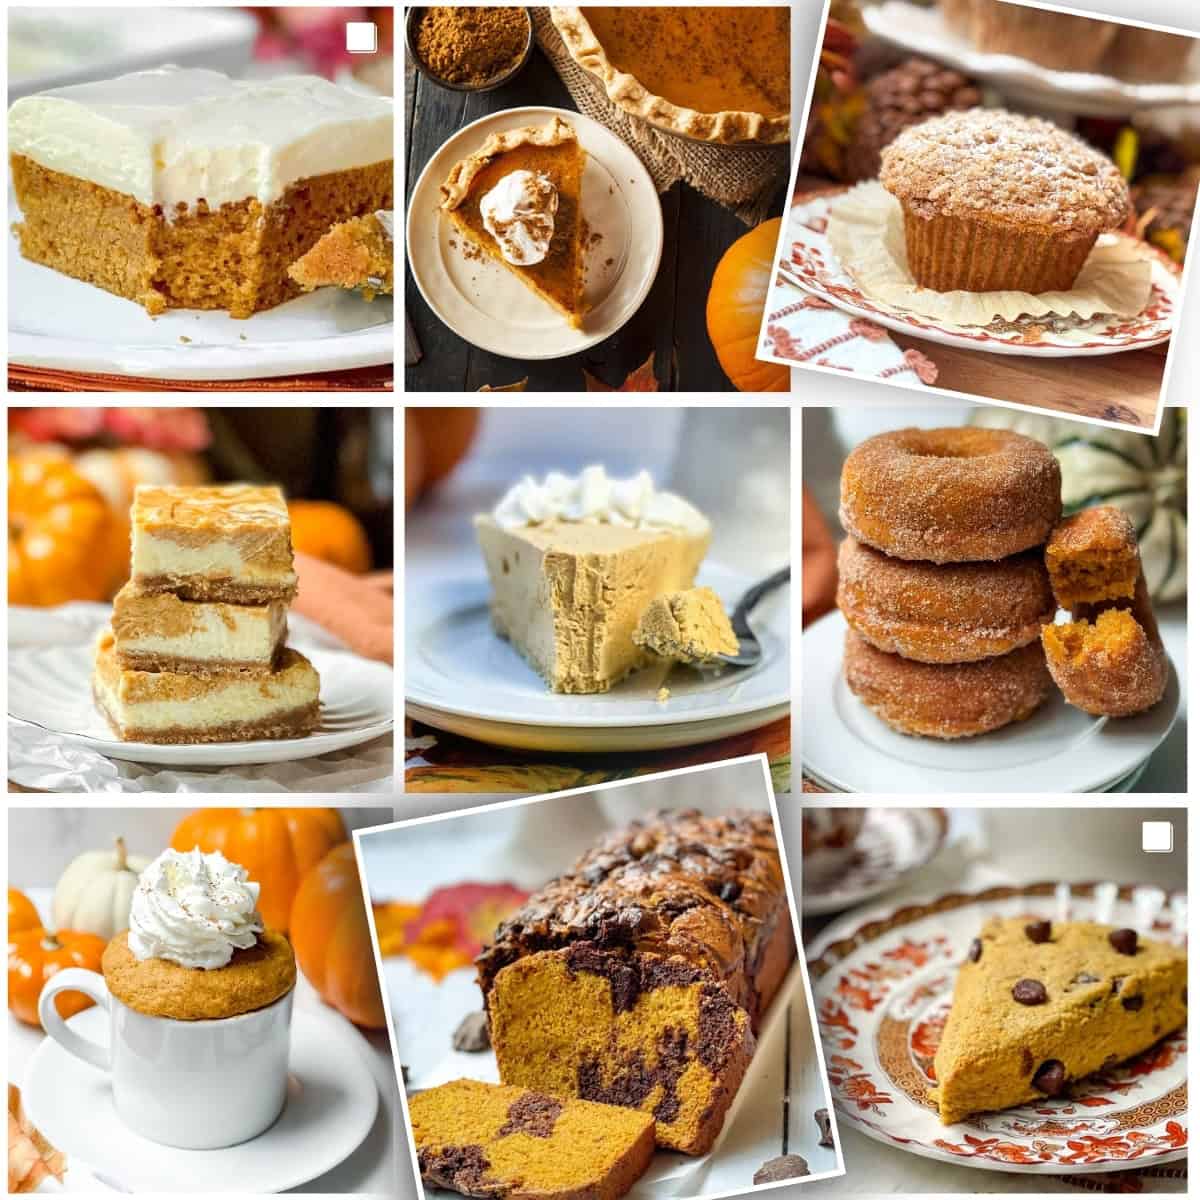
- 25 Easy Pumpkin Desserts to Make This Fall


If you try this recipe, I'd love to hear your comments and consider giving it a 5-star rating. Explore the recipe index for more easy, delicious ideas, and stay updated by subscribing to our newsletter and following us on Facebook, Pinterest, Instagram, and YouTube!
Want to save this recipe?
Enter your email, and we'll send it to your inbox. Plus, you'll get delicious new recipes from us every Friday!
Peanut Butter Chocolate Chip Spider Cookies Recipe
Ingredients
- ½ cup salted butter at room temperature (1 stick)
- ¾ cup brown sugar
- ½ cup creamy peanut butter
- 1 large egg
- 2 teaspoons vanilla extract
- 1 ½ cups all-purpose flour
- 1 teaspoon baking soda
- ½ teaspoon salt
- ½ cup mini chocolate chips
Spider Decorations
- mini peanut butter cups
- Milk Duds
- mini candy eyes
- melted chocolate (or chocolate hazelnut spread)
Instructions
- Preheat the oven to 350℉ and line a baking sheet with parchment paper.
- In a bowl, beat the butter, brown sugar, and peanut butter until light and fluffy, about 2 minutes. Add the egg and vanilla and beat until creamy. Mix in the flour, baking soda, and salt until combined and fold in the chocolate chips.
- Scoop the dough into 1 tablespoon size balls and place on the prepared baking sheet about 2 inches apart.
- Bake for 8 to 10 minutes, or until the cookies are just beginning to set on the edges, but are still soft on the inside.
- Top each cookie immediately with an upside-down peanut butter cup and 1 milk dud for the head. Let cool on the baking sheet.
Spider Cookies
- Add melted chocolate (or hazelnut chocolate spread) into a resealable sandwich bag and snip off the corner. Draw 3 legs on either side of the peanut butter cup. Dot the candy eyes with chocolate and then place on the Milk Dud. Let the cookies set until the chocoltae is firm.
Notes
- Peanut Butter: Use creamy peanut butter for the smoothest texture. Chunky or natural peanut butter can be used, but the cookies may spread more or have a different texture.
- Chocolate Chips: Mini chips are best for bite-size Spider Cookies, but regular chocolate chips or chopped chunks will also work.
- Chilling the Dough: Not required, but if your dough feels soft or sticky, chill it for 20-30 minutes to help the cookies keep their shape.
- Decorating: Let cookies cool completely before attaching the peanut butter cup "body" and piping on the chocolate "legs." Otherwise, the decorations may melt or slide.
- Make Ahead: Cookies can be baked and decorated up to 2 days in advance. Store them in an airtight container at room temperature.
- Freezing: Bake and cool cookies, then freeze undecorated for up to 2 months. Thaw before decorating with chocolate and candy eyes.
Nutritional information is only an estimate. The accuracy of the nutritional information for any recipe on this site is not guaranteed.
Comments
No Comments