
All-Butter Pie Crust

This all-butter pie crust is everything I want a homemade crust to be-flaky, buttery, tender, and easy to work with. Made with just five simple ingredients, it rolls out beautifully and bakes up golden and crisp. It's the crust I use for everything from my classic Apple Pie to pumpkin and pecan pies, tarts, and savory quiches.

This post may contain affiliate links. Please read our disclosure policy.
Want to save this recipe?
Enter your email, and we'll send it to your inbox. Plus, you'll get delicious new recipes from us every Friday!
Recipe Overview
- This crust makes enough for one double-crust or two single-crust pies.
- It's ideal for 9 inch pie plates and can be made ahead or frozen for busy holiday baking.
What I Love About This Pie Crust
I've made countless pie crusts through the years, and this is the one I always return to. Using all butter instead of shortening gives a deep, rich flavor and beautifully flaky layers.
It's reliable, forgiving, and easy to roll out - even for new bakers - and it pairs beautifully with everything from apple pie to pumpkin, pecan, or berry tarts.
Jump to:
Ingredients
Just five everyday ingredients come together to make the best homemade crust.

- All-purpose flour: The foundation of the crust. I use a little extra to fill a deep-dish pie plate generously.
- Granulated sugar: Adds a touch of sweetness and helps the crust brown evenly.
- Salt: Balances flavor and enhances the buttery richness.
- Unsalted butter: Cold, cubed butter is key for flaky layers and rich flavor.
- Ice water: Binds the dough together without making it heavy - keep it ice-cold for the best texture.
See recipe card for quantities.
How to Make All Butter Pie Crust
Follow these simple steps for a tender, flaky, buttery crust that works beautifully for any pie recipe.

- Step 1: In a large bowl, whisk together the flour, sugar, and salt until evenly mixed. Add the cold, cubed butter on top. Using a pastry cutter (or pulsing in a food processor), cut the butter into the dry ingredients until the mixture resembles coarse meal with pea-sized bits of butter.
Pro Tip: Visible butter pieces are what create those beautiful, flaky layers when baked.

- Step 2: Drizzle in 7 tablespoons ice water, stirring until the dough forms large clumps and holds together when pressed. The dough should feel moist and slightly tacky, but not sticky or wet.

- Step 3: Transfer the dough to a lightly floured surface. With floured hands (or a bench scraper), gently bring it together into a ball. Handle the dough as little as possible - overworking can make it tough.
If it feels dry or crumbly, sprinkle in a teaspoon of water; if sticky, dust lightly with flour.

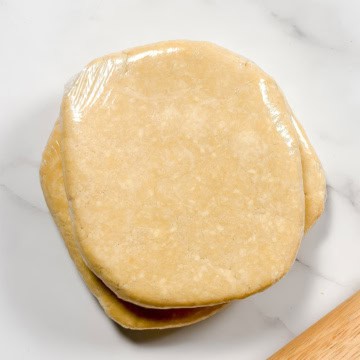
- Step 4: Divide the dough in half and shape each portion into a 1-inch-thick disc. Wrap tightly in plastic wrap and refrigerate for at least 1 hour (or up to 5 days). Chilling gives the gluten time to relax and helps reduce shrinking as the crust bakes.

- Step 5: When ready to bake, lightly flour your surface and rolling pin. Roll outward from the center in all directions, occasionally turning the dough to keep the circle even. Smooth the edges if cracks appear.
Rolling Tip: Keep the dough cool but pliable. If it becomes too soft, refrigerate briefly before continuing.
Pie Rolling & Fluting Tips
Rolling out pie dough doesn't have to feel intimidating. A few small techniques make all the difference between a crust that cracks or shrinks and one that bakes up beautifully golden and flaky.
- Keep everything cold. Chill your dough until it's firm but pliable - it should feel cool to the touch. If the butter starts to soften while rolling, pop it back into the refrigerator for 10 to 15 minutes.
- Lightly flour the surface. Dust your work surface, rolling pin, and dough with flour to prevent sticking, but use it sparingly - too much flour can toughen the crust.
- Roll from the center outward. Start in the middle of the dough and roll out in all directions using gentle, even pressure. Rotate the dough every few rolls to maintain a round shape and even thickness.
- Patch and smooth as you go. If cracks appear, pinch them together or smooth with a touch of water and a bit of dough from the edges.
- Fit and trim. When transferring to your pie plate, gently fold the dough in half (or roll it around the pin) and unroll it over the pan. Press lightly to fit the bottom and sides without stretching. Trim the overhang to about 1 inch.
- Flute or crimp the edges. Fold the overhang under itself to create a clean rim. Then, using your index finger and thumb on one hand and the knuckle of your other hand, gently pinch the dough into a wavy edge. For a simpler finish, press the edge with the tines of a fork.
Tip: Chill the pie shell for 15-20 minutes before baking to help the edges keep their shape.
Essential Pie Crust Tips
Once you've mastered the basics, these small adjustments can turn a good crust into a spectacular one.
- Keep it chilled, always. Cold ingredients are the secret to flakiness. Butter should stay cold until it hits the oven - if your kitchen is warm, refrigerate the dough briefly between steps.
- Mind the moisture. If the dough looks dry or crumbly, add ice water a teaspoon at a time until it holds together. If it feels sticky, dust lightly with flour and rest it in the fridge for a few minutes.
- Avoid overworking. Mix and knead the dough just enough to bring it together. Overmixing develops gluten, which makes a tough crust.
- Blind baking. Some single-crust pies require a partially or fully baked crust before adding the filling. Line the chilled crust with parchment and fill with pie weights or dried beans, then follow the baking time and temperature called for in your pie recipe. Blind-baking times vary depending on whether the crust will be baked again with a filling or needs to be completely baked before filling.
- Dock the crust. Pricking the bottom of the pastry can help prevent puffing when fully baking an empty pie shell, but it isn't necessary for every pie. Follow the directions for the filling you're making.
- Protect the edges. Use a pie shield or a strip of foil around the edges during baking to prevent over-browning.
- Let it rest. After baking, allow the pie to cool on a wire rack. This helps the filling set and keeps the crust crisp.
Pro Tip: If you're baking several pies for a holiday, make the dough ahead in batches and freeze the wrapped discs. Thaw overnight in the refrigerator before rolling.
Recipe FAQs
Yes! This dough can be made up to 5 days in advance and stored tightly wrapped in the refrigerator.
Absolutely. Wrap the discs tightly in plastic wrap and freeze for up to 3 months. Thaw overnight in the refrigerator before rolling out.
Keep the dough cold, avoid stretching it when fitting it into the pie plate, and bake the pie thoroughly according to the recipe. For fruit pies, I also like to preheat a rimmed baking sheet in the oven and carefully set the assembled pie onto the hot pan before baking. It gives the bottom crust an immediate boost of heat and catches any bubbling juices.
Pies to Make with This Crust
Use this crust for your favorite pies, both sweet and savory:
All Butter Pie Crust Recipe
Equipment
- Rolling Pin
Ingredients
- 2 ½ cups all-purpose flour
- 1 ½ teaspoons granulated sugar
- 1 teaspoon salt (use ½ teaspoon if using salted butter)
- 16 tablespoons unsalted butter (½ pound or 2 sticks), chilled and cut into ½-inch cubes
- 7 tablespoons ice water plus more by the teaspoon if needed
Instructions
- In a large bowl, whisk together the flour, sugar, and salt. Add the cold, cubed butter. Using a pastry cutter or food processor, cut or pulse the butter into the dry ingredients until the mixture resembles coarse crumbs with pea-sized pieces of butter remaining.
- Add 7 tablespoons ice water and mix just until the dough begins to form large clumps and holds together when pressed. If needed, add additional ice water 1 teaspoon at a time. Avoid overmixing or adding more water than necessary.
- Transfer the dough to a lightly floured work surface. Using floured hands or a bench scraper, gently bring the dough together into a ball. Handle it as little as possible; the dough does not need to be smooth.
- Divide the dough in half and gently shape each portion into a 1-inch-thick disc. Wrap tightly and refrigerate for at least 1 hour or up to 5 days.
- When ready to use, roll out the chilled dough according to your pie recipe.
Notes
- Make Ahead: Prepare the dough up to 5 days in advance and keep tightly wrapped in the refrigerator.
- Freezing: Freeze the wrapped dough discs for up to 3 months. Thaw overnight in the refrigerator before rolling.
- Keep It Cold: Cold butter is essential for flaky layers. If the dough or butter begins to soften while you work, refrigerate it briefly before continuing.
- Yield: Makes enough dough for one double-crust pie or two single-crust pies in 9-inch pie plates.
- Deep-Dish Pies: This recipe provides a generous amount of pastry for a standard 9-inch pie. For especially deep or oversized pie plates, roll carefully and avoid trimming the overhang until the crust is fitted.
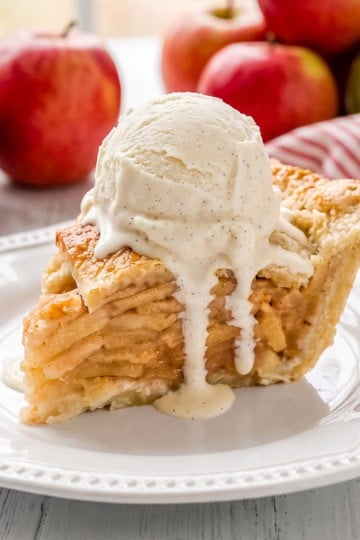
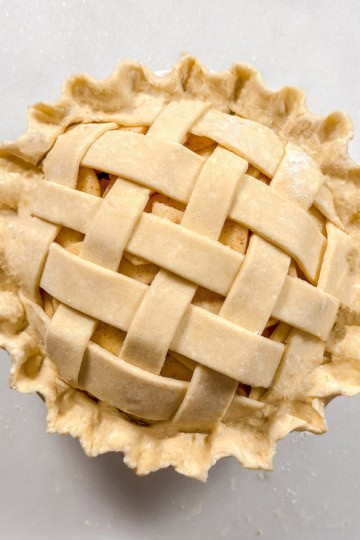
- For Apple Pie: This is the crust I use for my classic Apple Pie Recipe. For a woven top crust, see my Lattice Pie Crust Tutorial.
Nutritional information is only an estimate. The accuracy of the nutritional information for any recipe on this site is not guaranteed.
More Pie Recipes
Looking for other recipes like this? Try these:



If you try this recipe, I'd love to hear your comments and consider giving it a 5-star rating. Explore the recipe index for more easy, delicious ideas, and stay updated by subscribing to our newsletter and following us on Facebook, Pinterest, Instagram, and YouTube!
More Easy Pie Recipes
Popular Right Now


Love seasonal recipes and easy ideas for everyday cooking? Join 36,000+ readers and receive our newest recipes each week.
Subscribe to the Newsletter
This is my favorite pie crust recipe. It works beautifully every time and is perfect for most pies, whether they are sweet or savory, like quiche. I love to keep a couple in the freezer!