
100% Whole Wheat Bread (Single Loaf Recipe)


This 100% whole wheat bread is a simple way to make a single loaf of nourishing, delicious, homemade bread. Whether you're a first-time bread maker or a seasoned baker, you will fall in love with this soft and tender sandwich bread recipe.
If you're new to breadmaking, reference my Bread Making Guide for answers to common FAQs.

This post may contain affiliate links. Please read our disclosure policy.
Want to save this recipe?
Enter your email, and we'll send it to your inbox. Plus, you'll get delicious new recipes from us every Friday!
About the Recipe
Our most popular bread recipe on the site is our classic wheat bread recipe. Many first-time breadmakers have tried this recipe with success, and many seasoned breadmakers have loved it. The recipe, however, makes two loaves, and many readers have asked me to create a single-loaf whole wheat bread recipe. So this is the promised recipe.
It is delicious and simple to make. Whether you're a beginning or seasoned baker, it's a classic recipe I make all the time.
Jump to:
- About the Recipe
- Whole Wheat Bread Ingredients
- How to Make a Single Loaf of Whole Wheat Bread
- The Secret to Perfect Hydration
- Tips for Making Whole Wheat Bread
- Pro Tips for Light & Fluffy Whole Wheat Bread
- How Long Will Homemade Bread Last?
- 100% Whole Wheat Bread Single Loaf Recipe
- More Bread Recipes You May Also Want to Try
- Comments
Whole Wheat Bread Ingredients
Here are the key ingredients you will need to make this delicious homemade bread.

- Whole wheat flour: I use stone-ground whole wheat flour, but whole wheat bread flour and white whole wheat also work.
- Instant Yeast: I love instant yeast because you can add it directly to the dough without proofing. If you want to use active dry yeast, dissolve it in 2 tablespoons of the water in the recipe, along with a drizzle of honey, for 5 minutes before proceeding with the recipe.
- Honey
- Cooking oil: Use your favorite neutral cooking oil
- Salt
How to Make a Single Loaf of Whole Wheat Bread
Here are the steps for making this soft, delicious, and wholesome whole bread recipe.
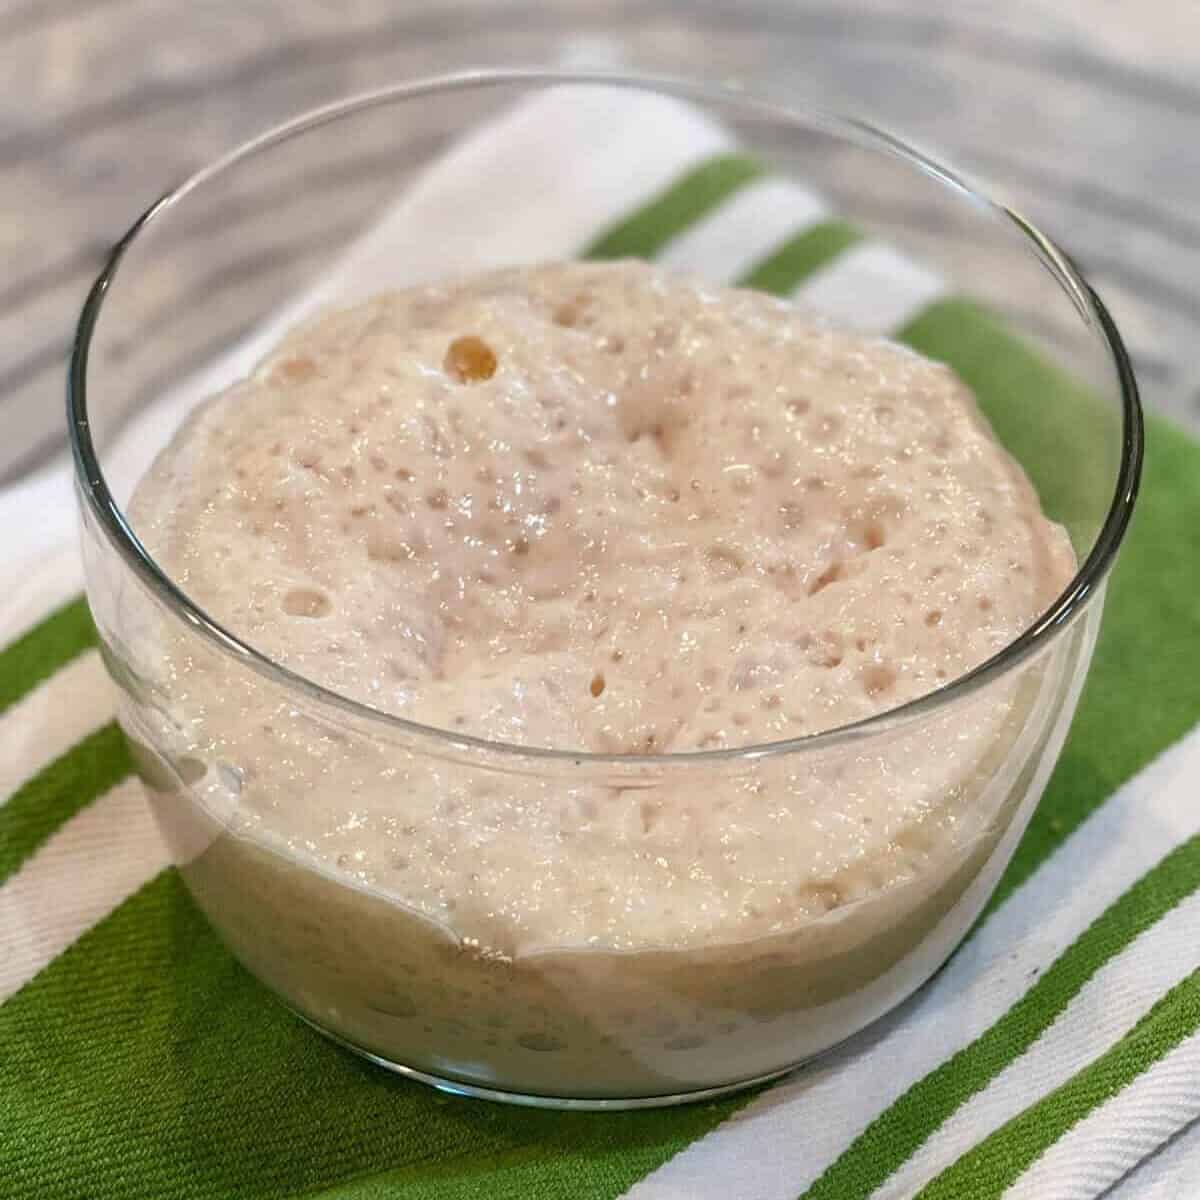
If You Are Using Active Dry Yeast (Proofing Step)
If you aren't using Instant Yeast, you must "wake up" your yeast before starting the recipe. Note: Do not add extra water for this step; use the ingredients already measured for the recipe.
- Separate the Water: Measure out ¼ cup of the warm water (105F-115F) from the 1 ¼ cups of water called for in the recipe.
- Dissolve Honey: Stir 1 teaspoon of the honey (from the recipe's 2 tablespoons) into that warm water.
- Bloom the Yeast: Sprinkle your packet of Active Dry Yeast over the top. Stir gently and let it sit for 5-10 minutes.
- Check for Foam: Once the mixture is bubbly and foamy, it's ready! Add this "slurry" along with the remaining water, honey, oil, and flour to your mixer.
- Skip This Step: If you are using Instant Yeast, simply whisk the dry yeast directly into your flour and add all liquids together at once.

Phase 1: Mixing and Kneading
- Combine Ingredients: Add the flour, water, yeast, honey, oil, and salt to your mixer. Stir until the dough begins to pull away from the sides.
- Knead for Strength: Knead for 5-10 minutes on medium speed (or 6-7 minutes by hand).
- The Tacky Test: Check the texture. It should feel like a Post-it note-tacky to the touch but not sticking to your fingers. Add 1 tablespoon of flour at a time only if necessary.
- Perform the Windowpane Test: Stretch a small piece of dough; if it becomes translucent without tearing, the gluten is ready.

Phase 2: The First Rise
- Prep for Rise: Transfer the dough to an oiled bowl, then loosely cover it with a damp cloth or plastic wrap.
- Bulk Ferment: Place in a warm, draft-free spot (like your microwave "proofing box") for 1-2 hours.
- Check for Puffiness: Don't wait for a clock-wait for the dough to look visibly puffed and relaxed, even if it hasn't quite doubled in size.

Phase 3: Shape & Bake
- Shape the Loaf: Gently deflate the dough and roll it into an 8-inch log. Pinch the seams tightly to ensure a strong structure.
- Second Rise: Place in your prepared 8.5 x 4.5-inch pan. Let it rise until the center reaches about 1 inch above the rim.

Phase 4: Baking
- Bake until Golden: Bake at 350°F for 35-40 minutes.
- Verify Temperature: For a perfect crumb, use a digital thermometer to ensure the internal temperature is between 180°F and 190°F.
The Secret to Perfect Hydration
One of the most common questions I receive about whole wheat bread is regarding the "stickiness" of the dough. Because whole wheat flour is high in fiber, it absorbs moisture more slowly than white flour. If your dough feels too wet or sticky at first, don't rush to add more flour!
Give the ingredients a few minutes to "introduce" themselves during the kneading process. The honey and oil also contribute to that initial tacky feel, but as the gluten develops, the dough will transform into a smooth, supple ball. I have included gram measurements below to ensure the most consistent results, as even a slightly "heavy" or "light" cup of flour can change how the dough handles.
Tips for Making Whole Wheat Bread
Bread making is easy, but these tips will help you ensure your bread is as delicious as possible.
Kneading the Bread
It's important to knead the bread to develop gluten, which helps it rise. The window pane test is a simple way to determine whether your bread is ready to rise.
Take a small section of dough and stretch it into a square shape (like a window). Continue stretching until the middle becomes thin enough that light can pass through it without being obstructed. If there are no tears in the dough, you can be sure it is properly kneaded.
Dough Rising
Professional bakeries often have proofing ovens (also known as proofers, proofing cabinets, dough proofers, or proofing boxes). These help ensure the dough is in an ideal environment of warmth and humidity, allowing it to rise to its maximum potential.
I don't have a proofing box at home, but years ago, while speaking to a colleague and professional breadmaker, he shared his trick for creating one. I do this every time I bake bread.

Add 2 cups of hot water to a jar or liquid measure. Loosely cover your dough and add both to a microwave. Close the door and don't open it for about 1 hour. It really does create the perfect environment for bread to rise!
You can also add a loaf pan filled with very hot water to the bottom of your oven. Place the covered dough on a rack above the water and let it proof there. Do not turn on the oven.
Pro Tips for Light & Fluffy Whole Wheat Bread
If this is your first time making 100% whole wheat bread, keep these three essential tips in mind to guarantee a light, tender loaf:
- Be Patient with Proofing: Whole wheat flour is heavier than white flour and needs more time to rise. Don't rely on the clock-wait until your dough has truly doubled in size during both rises. This is the key to preventing density!
- Measure Flour Precisely: Too much flour is the fastest route to a heavy, dense loaf. Always use the spoon-and-level method or, ideally, weigh your flour. Never scoop directly from the bag.
- Check Water Temperature: To prevent an overly strong, yeasty flavor, ensure the water used to proof the yeast is only warm to the touch (around 105°F to 115°F). If it's too hot, the yeast will work too fast and create off-flavors.
How Long Will Homemade Bread Last?
Because homemade bread doesn't typically contain preservatives, it doesn't last as long as store-bought bread.
Cool the bread completely and store it at room temperature in an airtight container or resealable bag for 2-4 days. Properly stored in the refrigerator, it will increase its shelf life to about 1 week.
For longer storage, it can be frozen as a whole loaf or sliced for up to 3 months.

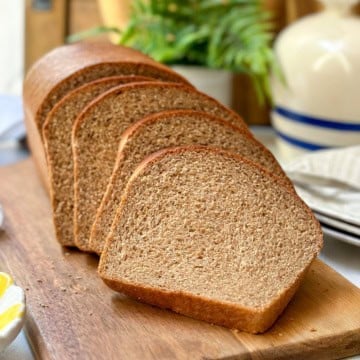
100% Whole Wheat Bread Single Loaf Recipe
Ingredients
- 3 ⅓ cups whole wheat flour* (plus 1-2 tablespoons as needed)
- 1 ¼ cups warm water
- 2 ½ teaspoons instant yeast or 1 packages active dry yeast dissolved in 2 tablespoons of the water in the recipe
- 2 tablespoons honey
- 1 tablespoon oil
- 2 teaspoons salt
Instructions
Proofing Active Dry Yeast
- If you're using active dry yeast instead of instant yeast (which can be added directly to the ingredients), add warm water and honey to a large bowl or the bowl of your stand mixer. Sprinkle the yeast over the top and let it sit for 5 minutes. If using instant yeast, skip this step.
Combine the Ingredients
- Add flour, water, instant yeast (or proofed active dry yeast) honey, oil, and salt into the bowl of a stand mixer. Stir until the dough begins to pull away from the sides of the bowl.
Knead the Dough
- If kneading by hand, transfer the bread dough to a very lightly floured surface, oil your hands, and knead for 6 to 10 minutes or until smooth. If kneading in a stand mixer, use the dough hook and knead for 5-8 minutes at medium speed until smooth and elastic. The dough should be tacky but not sticky. Knead until it passes the windowpane test. Adjust the dough with additional flour or water if necessary.
First Rise
- Transfer the dough to an oil-coated bowl and let rise in a warm place for 1-2 hours, or until the dough becomes puffy. It may not double in size.
Shape the Loaf
- Coat an 8 ½ x 4 ½ inch loaf pan and set aside. Then, gently deflate the dough and shape it into an 8-inch log, pinching the seam and the ends together tightly. Place the dough, seam side down, in the prepared pan and cover loosely.
Second Rise
- Let the bread rise for 1-2 hours, or until the center has crowed about 1 inch above the rim. Preheat the oven to 350℉ near the end of this last rising.
Bake the Bread
- Uncover the loaves and place them in the oven. Bake for 35 to 40 minutes or until a digital thermometer registers between 180° 190°F. If desired, tent a sheet of foil over the loaf after 20 minutes to prevent over-browning.
- Remove the bread from the oven and from the loaf pan. Transfer to a rack to cool completely before slicing. Brush melted butter or olive oil over the warm bread for a delicious crust as it cools.
Notes
Whole Wheat Flour
- Regular whole wheat, whole wheat bread flour, white whole wheat flour all work great. I always use Stone Ground Whole Wheat Flour.
- Adjust the flour amount as necessary so that it pulls away from the bowl and is easily handled.
Storage
- Wrap bread and store it at room temperature for several days or freeze it for longer storage.
Bread Rising
- I learned a trick bread-rising trick a long time ago that I've used in my kitchen ever since. And it works regardless of the season. Bread needs a warm place to rise. A professional breadmaker told me he doesn't have a proofing box at home, so he adds a cup of very warm water and the covered dough into the microwave. It creates the perfect "proofing box" at home. Just be sure not to accidentally start the microwave!
Nutritional information is only an estimate. The accuracy of the nutritional information for any recipe on this site is not guaranteed.
More Bread Recipes You May Also Want to Try
- Homemade Hamburger Buns
- Blueberry Cream Cheese Danish Buns
- Healthy Zucchini Spice Muffins
- Colonial Scones: Recipe from the Early American Tea Table




If you try this recipe, I'd love to hear your comments and consider giving it a 5-star rating. Explore the recipe index for more easy, delicious ideas, and stay updated by subscribing to our newsletter and following us on Facebook, Pinterest, Instagram, and YouTube!
More Bread



Popular Right Now



Love seasonal recipes and easy ideas for everyday cooking? Join 36,000+ readers and receive our newest recipes each week.
Subscribe to the Newsletter
This is my go to bread. It stores well and it's tasty
Hi Veronica! I love this bread too and make it almost every week.
I have made this bread for my picky mother-in-law three times now! She loves it!!! Thank you so much 🥰🥰🥰
Kerry, this is wonderful to hear! Winning over a mother-in-law three times is very high praise. I’m so happy she loves the bread. Thank you for sharing this with me!